Magzin - WordPress Theme Documentation.
- Item Name: Magzin - Modern Magazine Blog WordPres Elementor Theme
- Last Update: 15 Sep 2025
- Item Version: v1.0
- Author: alithemes
- Support Ticket: Theme Support
- Website: Theme Documentation
First of all, Thank you so much for purchasing this template and for being my loyal customer. You are awesome! You are entitled to get free lifetime updates to this product + exceptional support from the author directly.
This documentation is to help you regarding each step of customization. Please go through the documentation carefully to understand how this template is made and how to edit this properly.
Theme Requirements
To use Magzin, make sure your hosting provider is running the following software:
- WordPress 6.0 or higher.
- PHP 8.1 or greater. WordPress officially suggests to use PHP 8.2.23.
- MySQL 5.6 or greater.
Recommended PHP Limits
Many issues that you may run into such as: white screen, demo content fails when importing, empty page content and other similar issues are all related to low PHP configuration limits. The solution is to increase the PHP limits. You can do this on your own, or contact your web host and ask them to increase those limits to a minimum as follows:
max_execution_time 180memory_limit 128Mpost_max_size 64Mupload_max_filesize 32Mmax_input_time = 300max_input_vars = 3000wp_memory_limit = 256M
Also consider upgrading your PHP version to the latest version, the newer the better.
WordPress Information
To install this theme you must have a working version of WordPress already installed. If you need help installing WordPress, follow the instructions in WordPress Codex or you can watch the. Below are ll the useful links for WordPress information.
- WordPress Codex – general info about WordPress and how to install on your server
- First Steps With WordPress – general information that covers a wide variety of topics
- FAQ New To WordPress – the most popular FAQ’s regarding WordPress
What's included
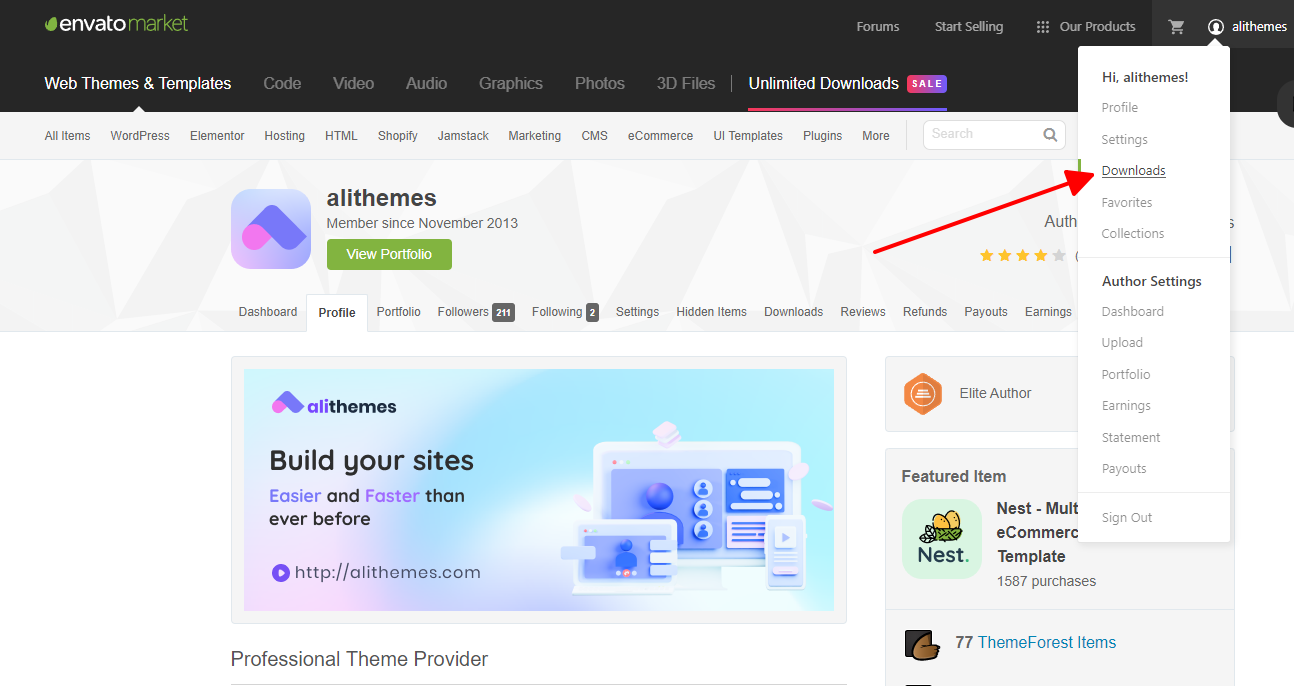
When you purchase our theme from Themeforest, you need to download the Magzin files from your Themeforest account. Navigate to your downloads tab on Themeforest and find Magzin. Click the download button to see the two options. The Main Files contain everything, the Installable WordPress Theme is just the installable WordPress theme file. Below is a full list of everything that is included when you download the main files, along with a brief description of each item.
-
Installable WordPress file only. You can upload this file when you install the theme.
-
All files and documentation (full zip folder). You will need to extract and locate the installable WordPress file to upload when you install the theme.
Theme Installation
It’s easy to install Magzin. Just follow these steps, they won’t take much of your time.
-
Download the theme zip file from your
Envato account from
ThemeForest.
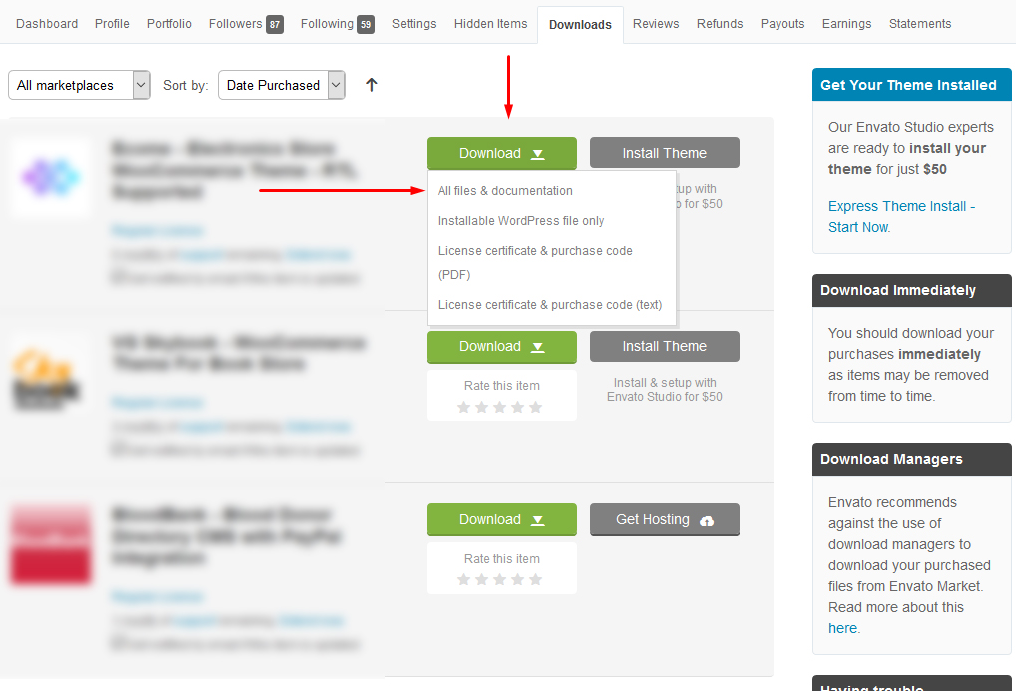
- **All files & documentation **(full zip folder). You will need to
extract and locate the
installable WordPress file to upload when installing theme

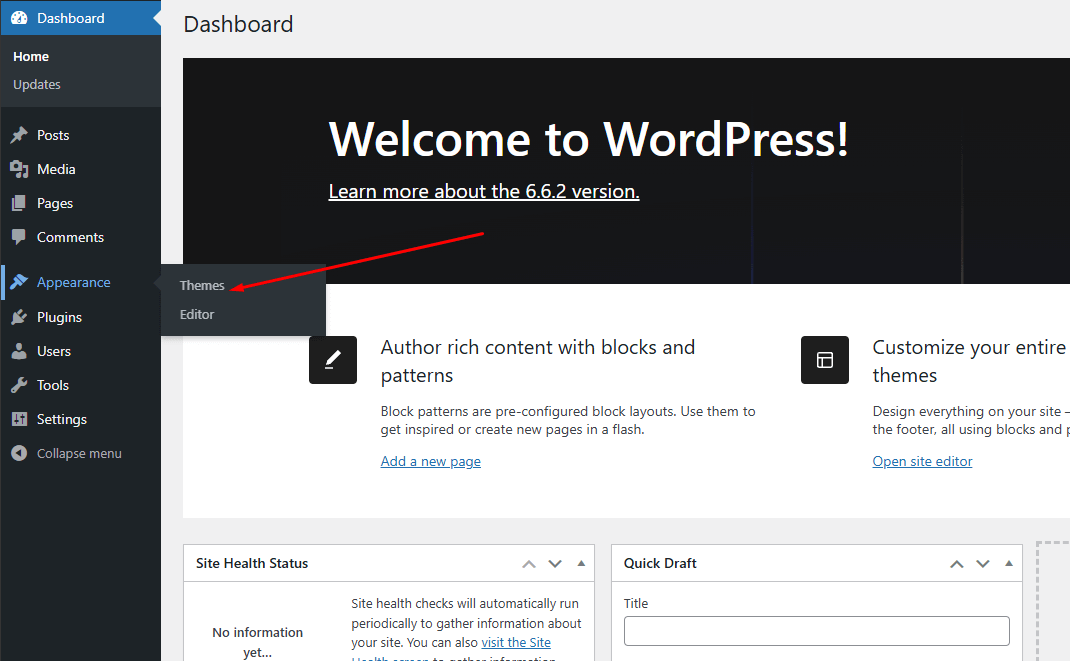
- Log in to your WordPress Dashboard (Ex: http://yourwebsite.com/wp-admin).
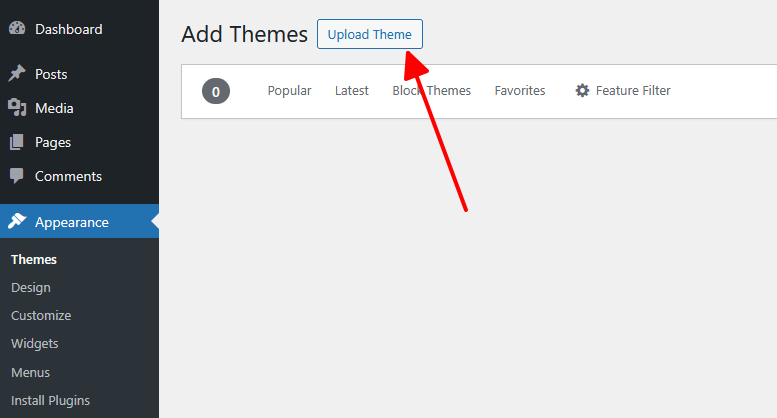
- Navigate to Appearance > Themes.
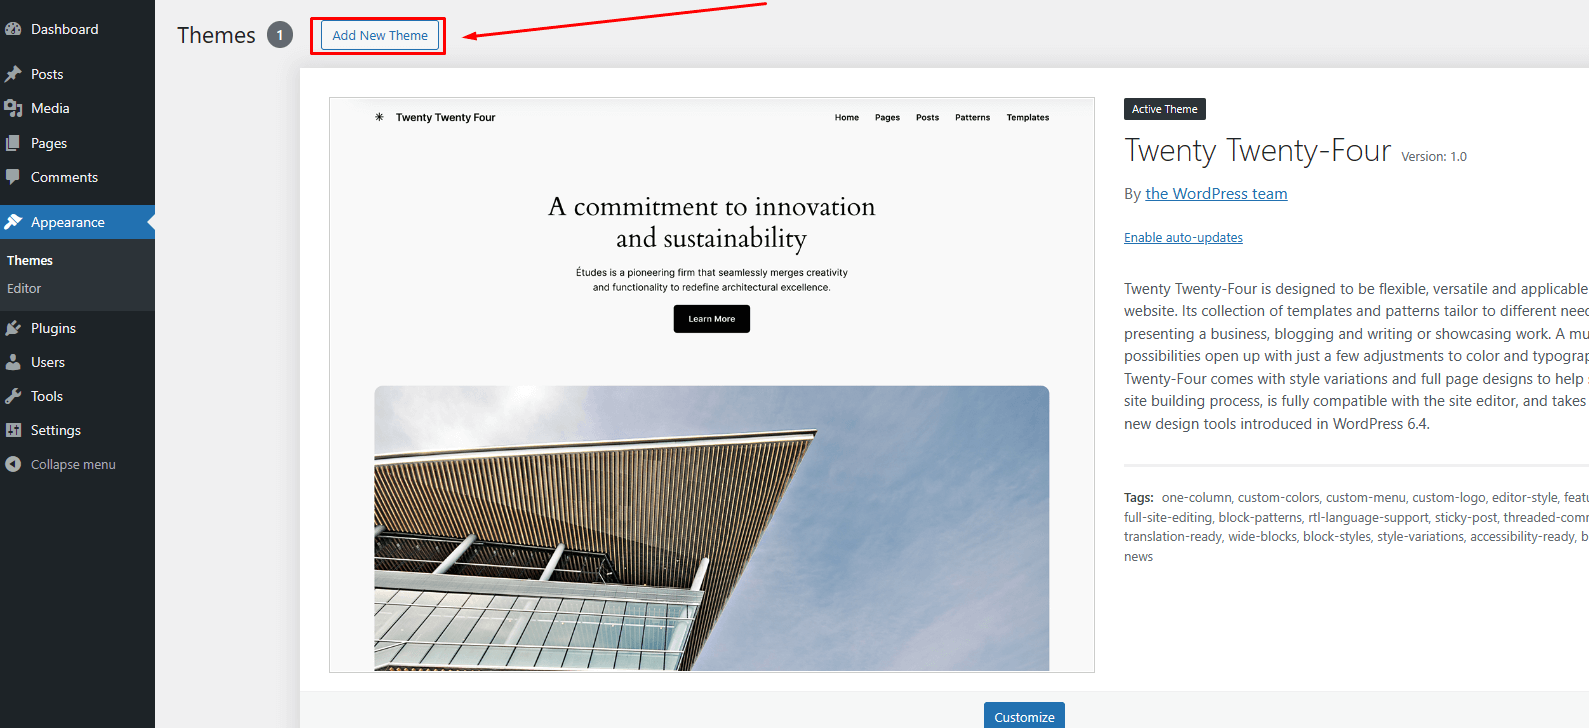
-
Click on Add New and then Click on
Upload Theme .
- Click Add New, then click Upload Theme >
Choose File
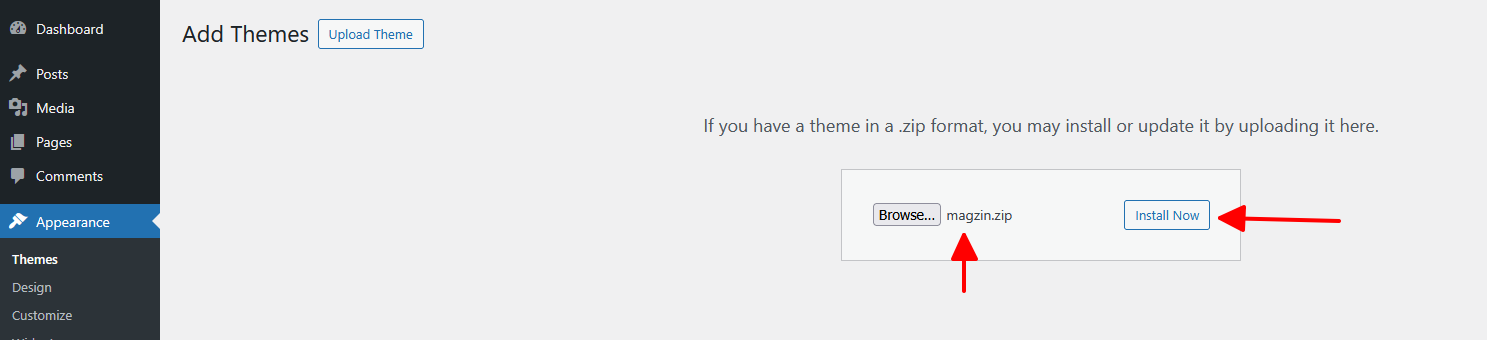
- Navigate to the magzin.zip file on your computer, then click Install
Now
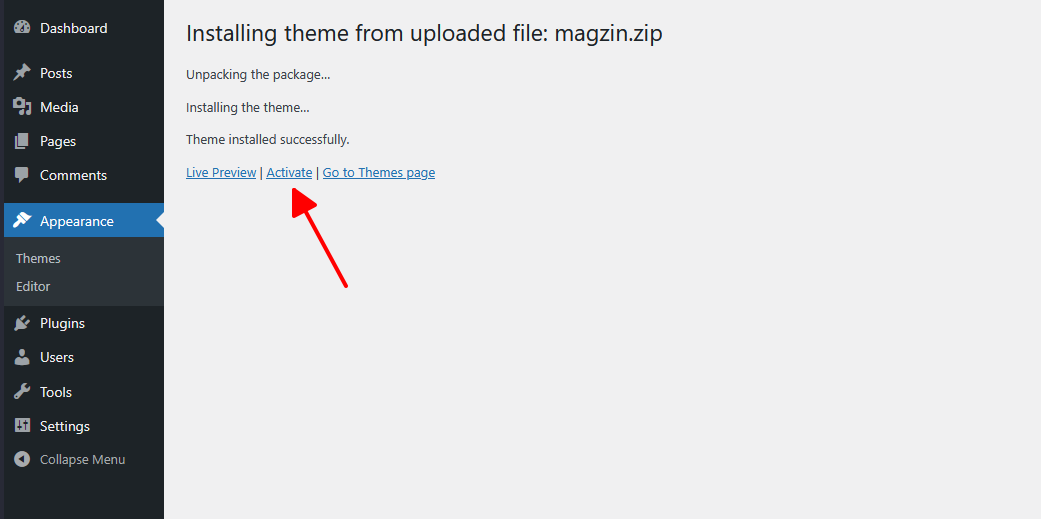
- When the installation complete, click Activate. You will be
redirected to Themes page with Magzin activated.
Install theme via FTP
To manually upload your new WordPress theme, login with your credentials to your website and locate the wp-content folder in your WordPress install files. Upload the un-zipped 'Magzin' folder into the: wp-content/themes folder.
Once uploaded, activate the theme by heading to the “Themes” menu in the WordPress Dashboard. Locate the Magzin Theme and hit “Activate”.
The theme files will be stored on your server in the wp-content/themes/ location.
Note: When uploading your theme with the installer, please ensure you are uploading the theme .zip file, not the entire package you downloaded. In this case, you will be uploading Magzin.zip
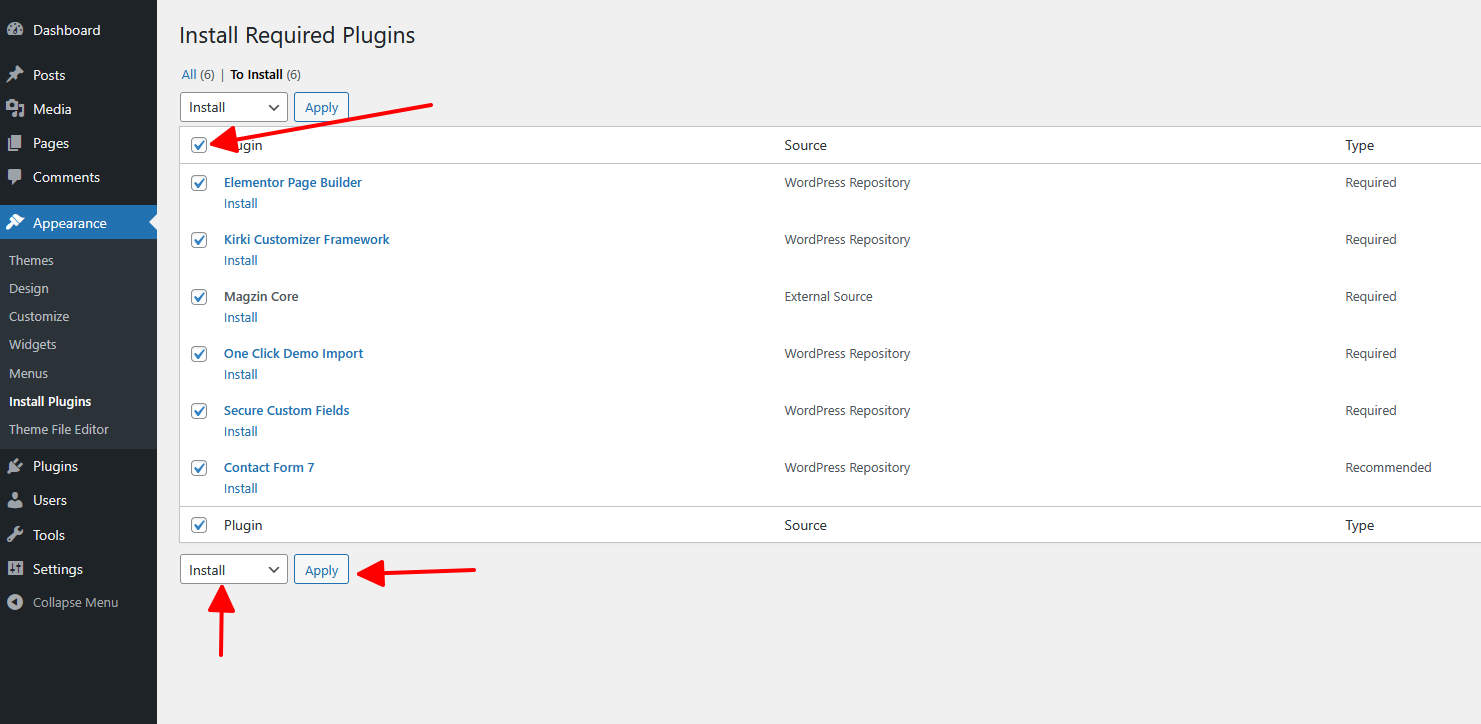
Install necessary plugins
After installing and activating the theme, you need to install some required plugins. Please follow the steps below:
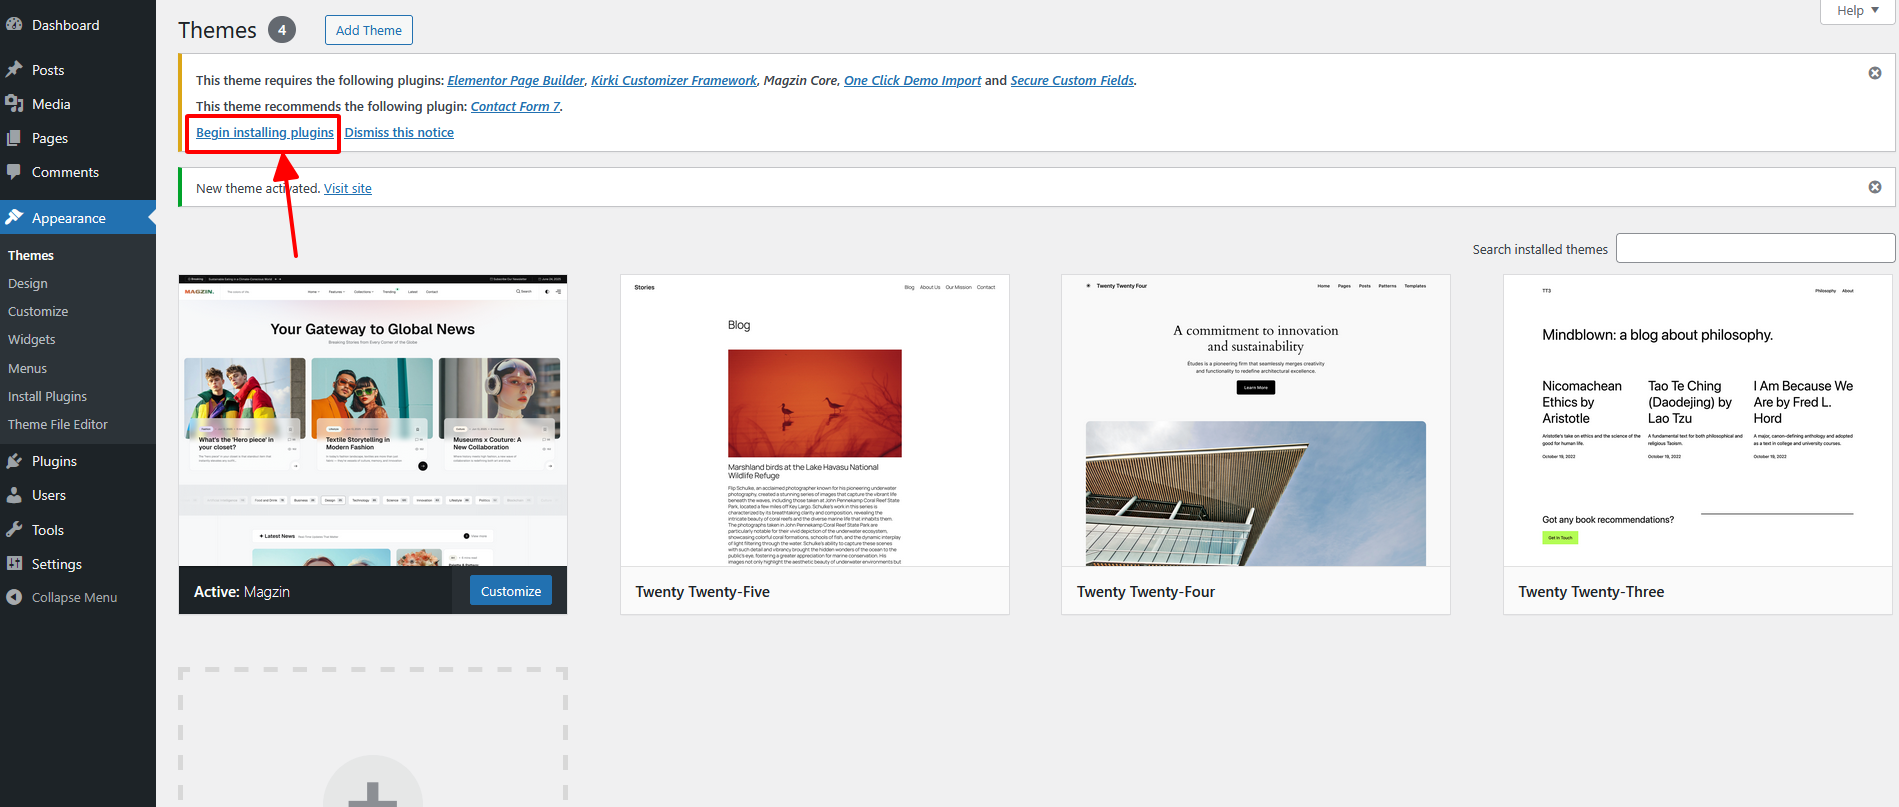
Select all plugins → Choose Install → Click Apply.
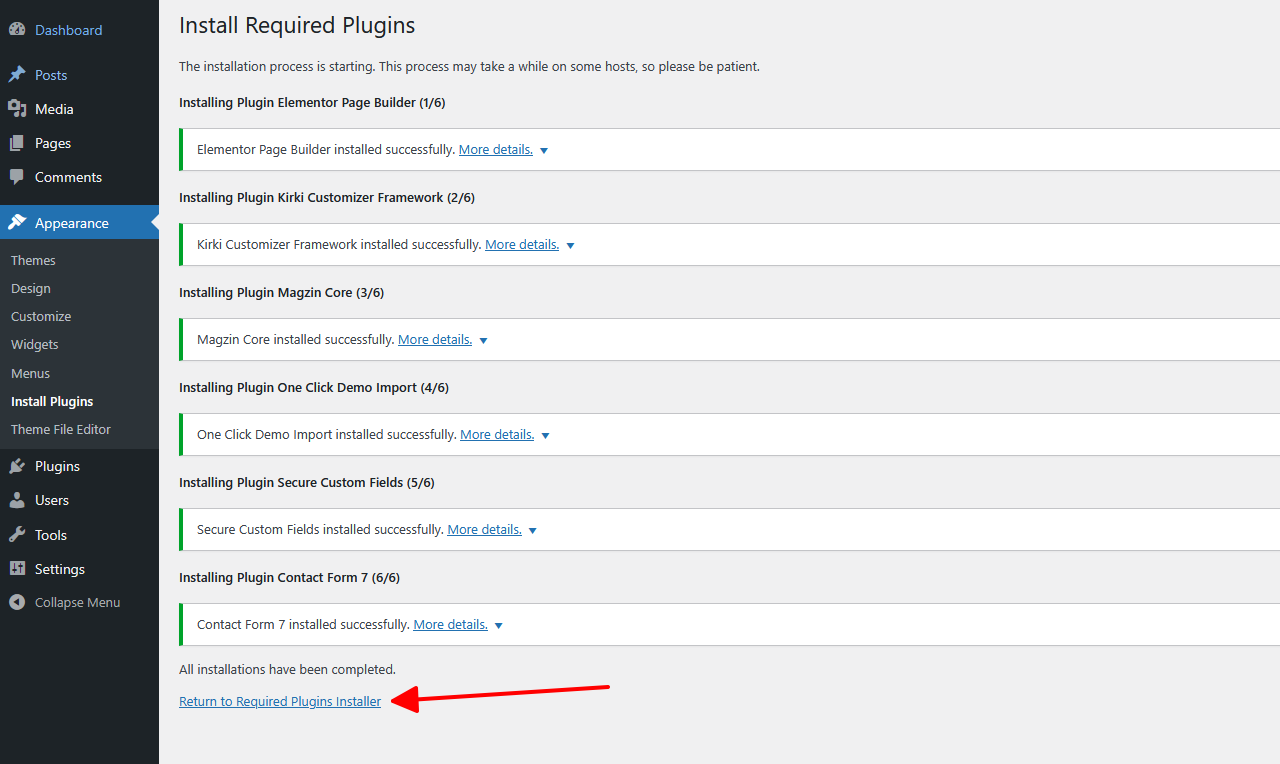
Wait a few minutes and the successful installation screen will appear. Click "Return to Required Plugins Installer".
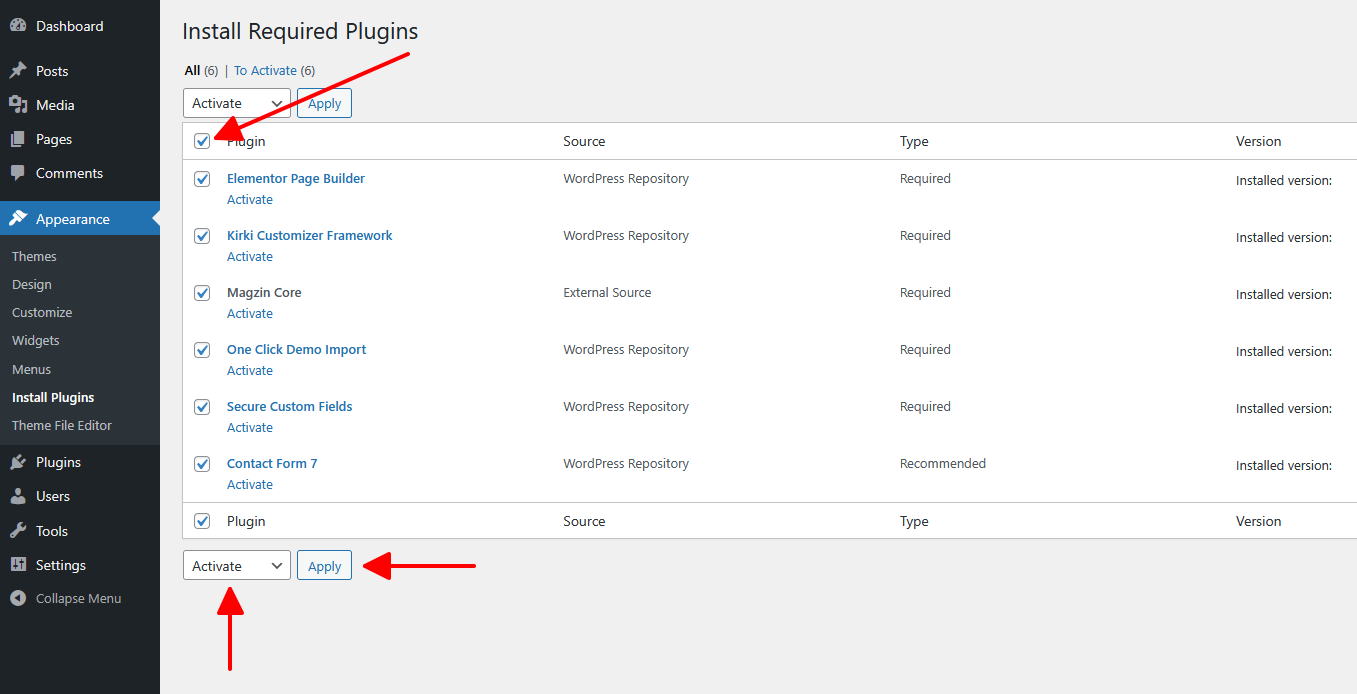
Select all plugins -> Choose Activate -> Click Apply.
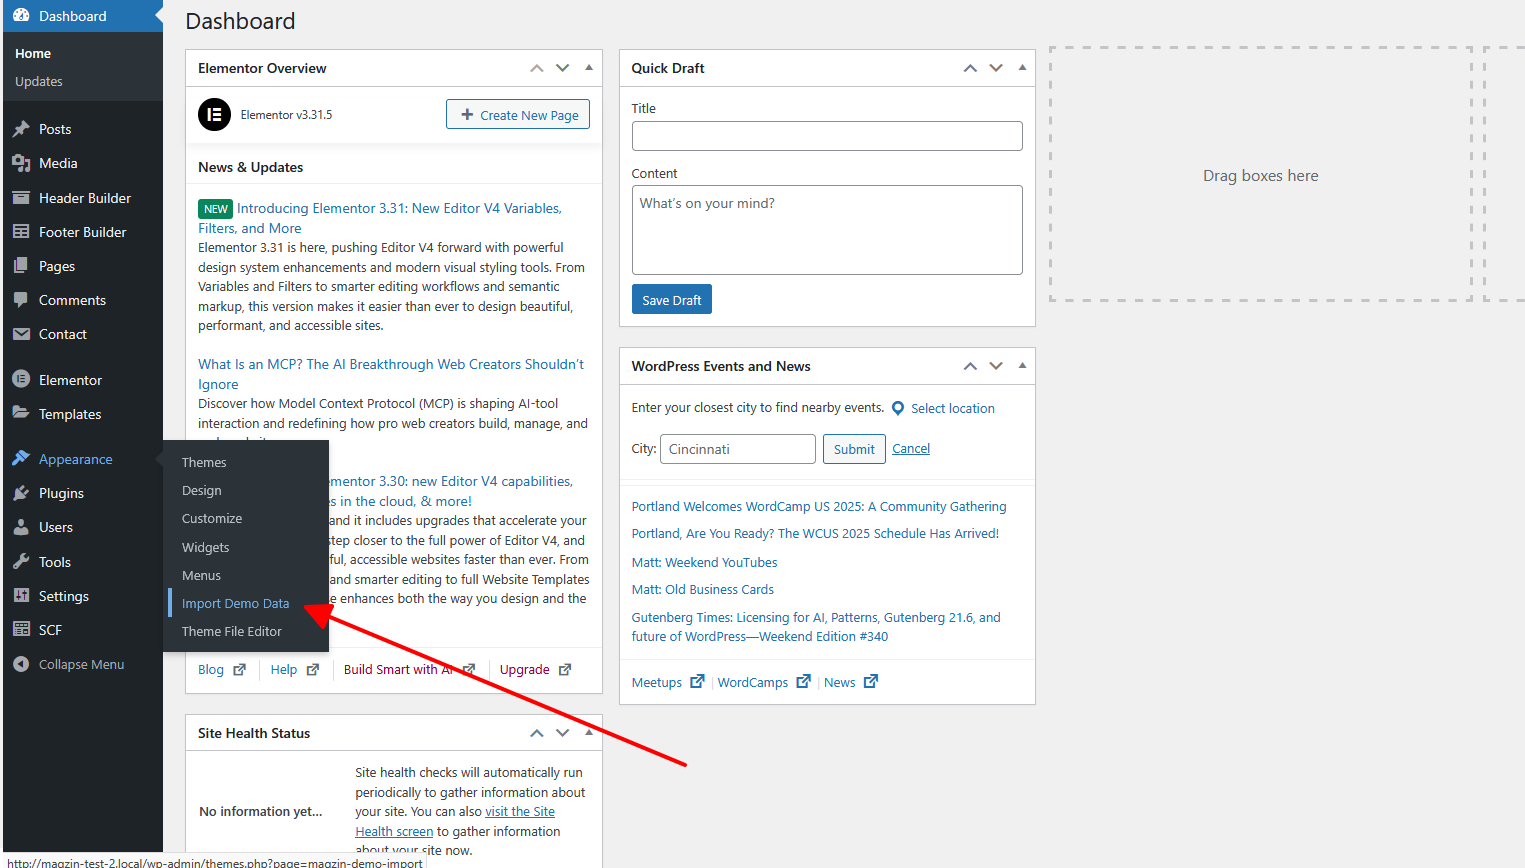
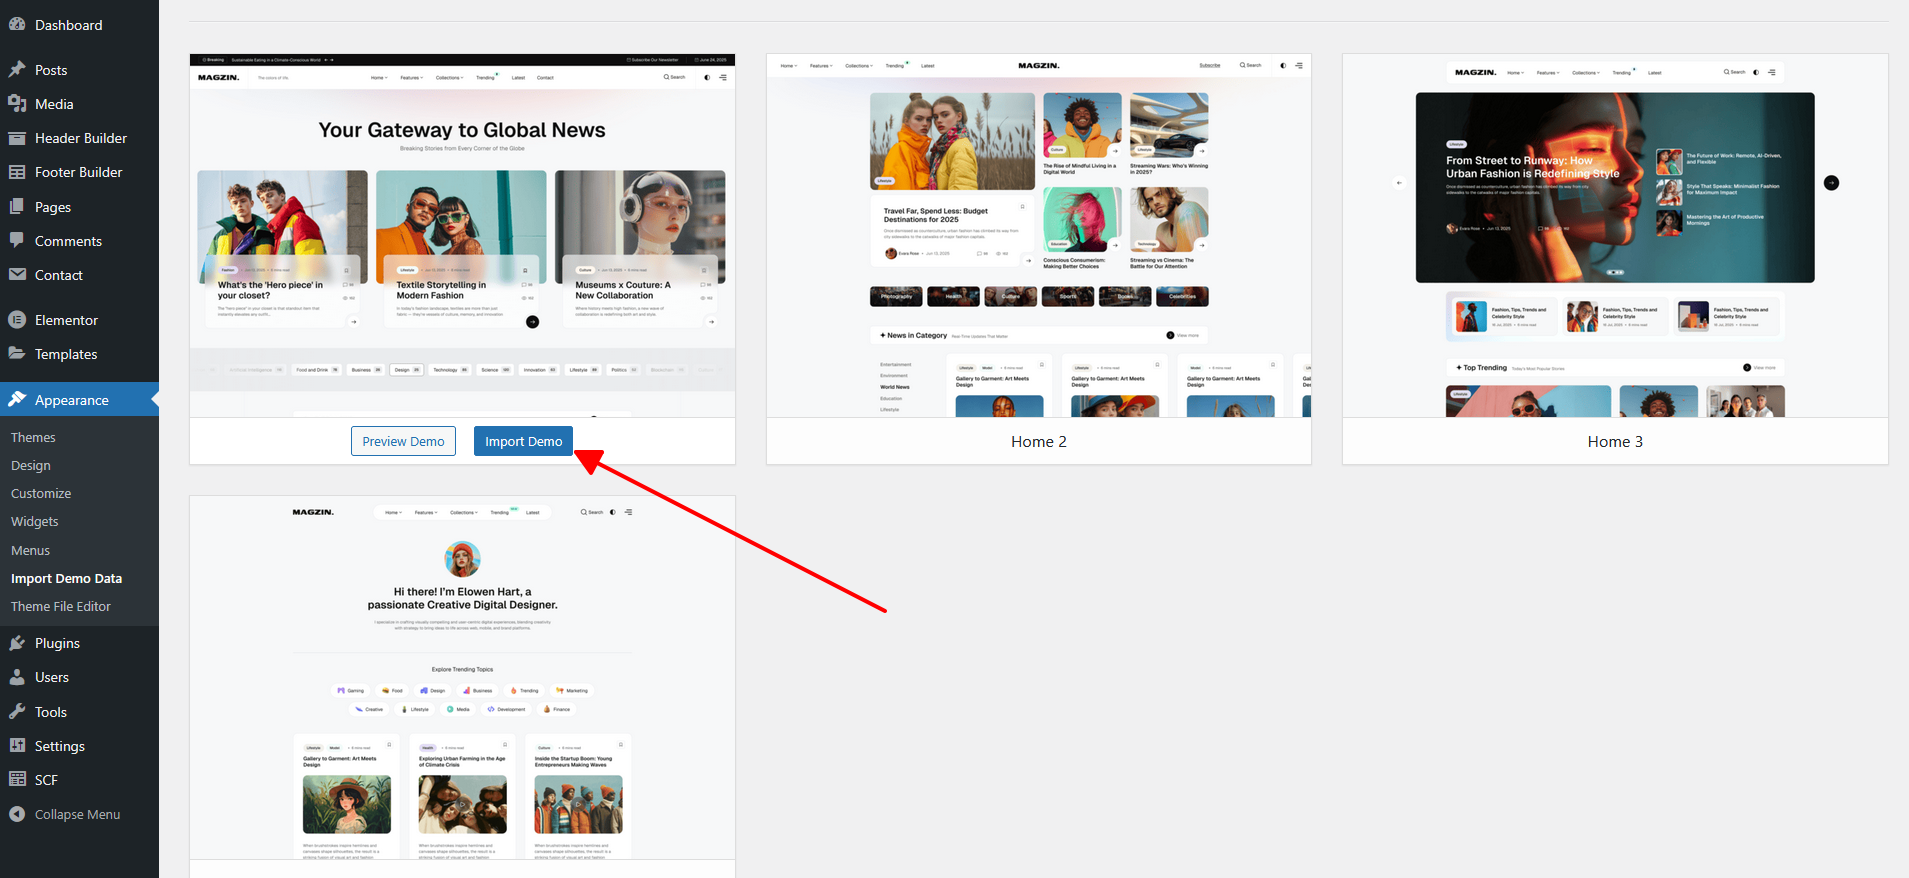
One-Click Import Demo Data
If you want to have a website exactly like our demo ( https://magzin.alithemes.net ) please go to Appearance -> Import Demo Data.
Select the homepage you want, then click Import.
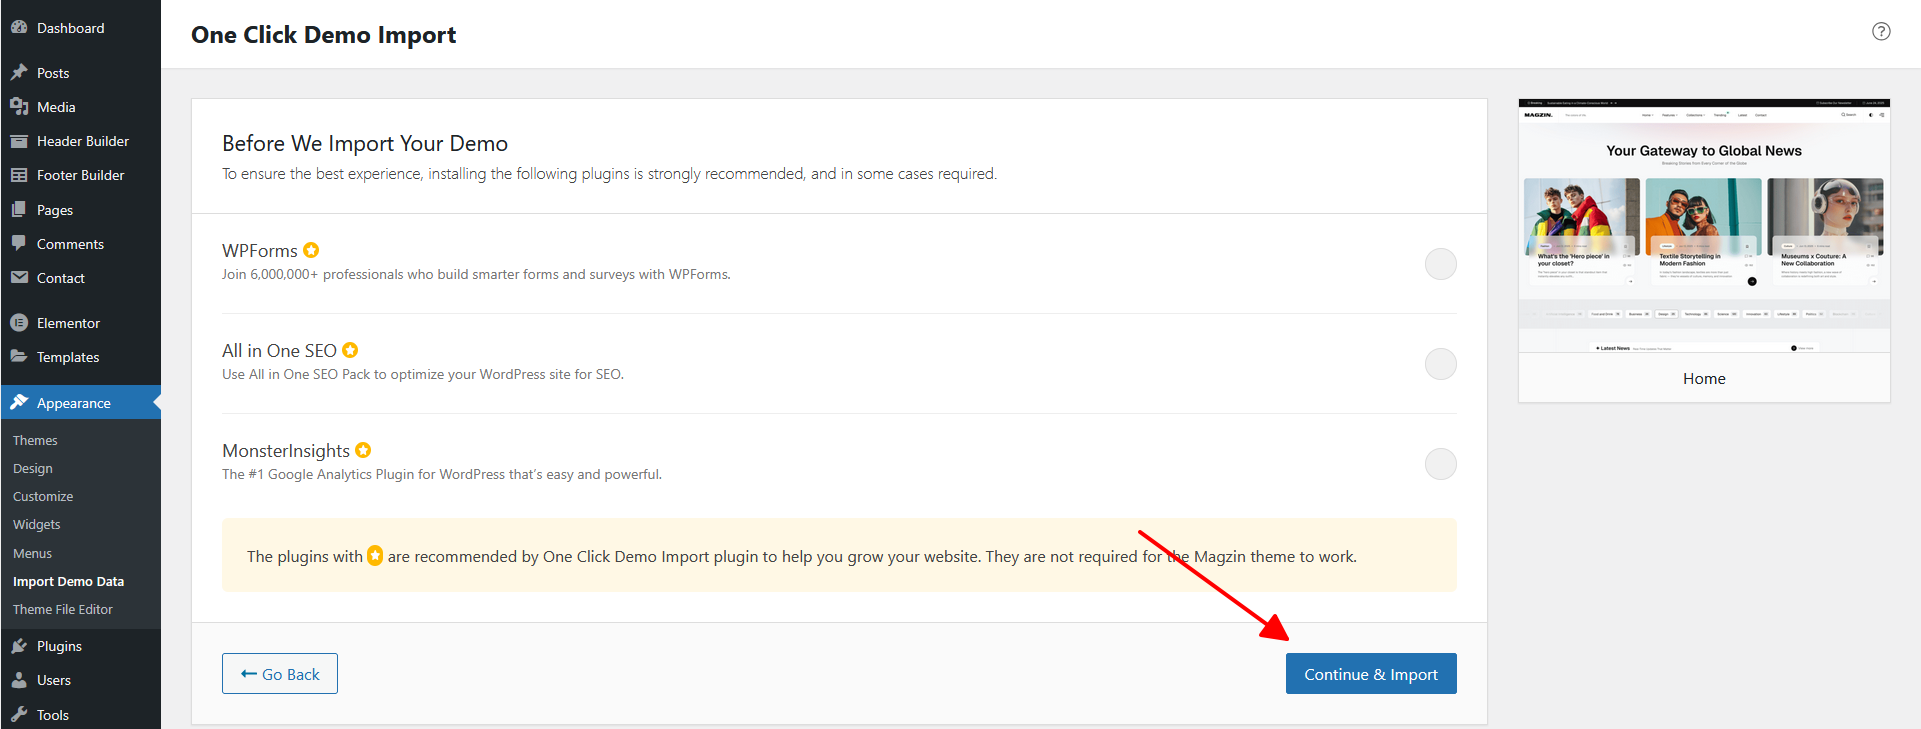
Select Plugins (You may skip this step).
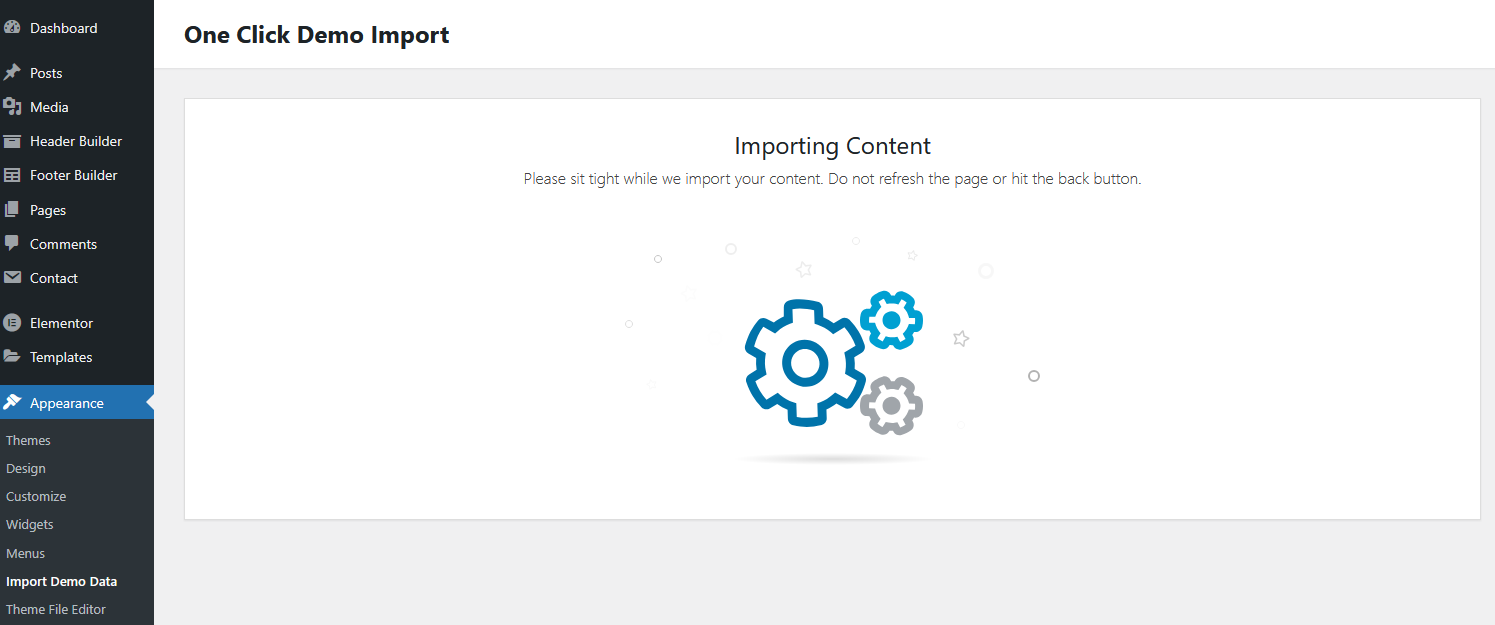
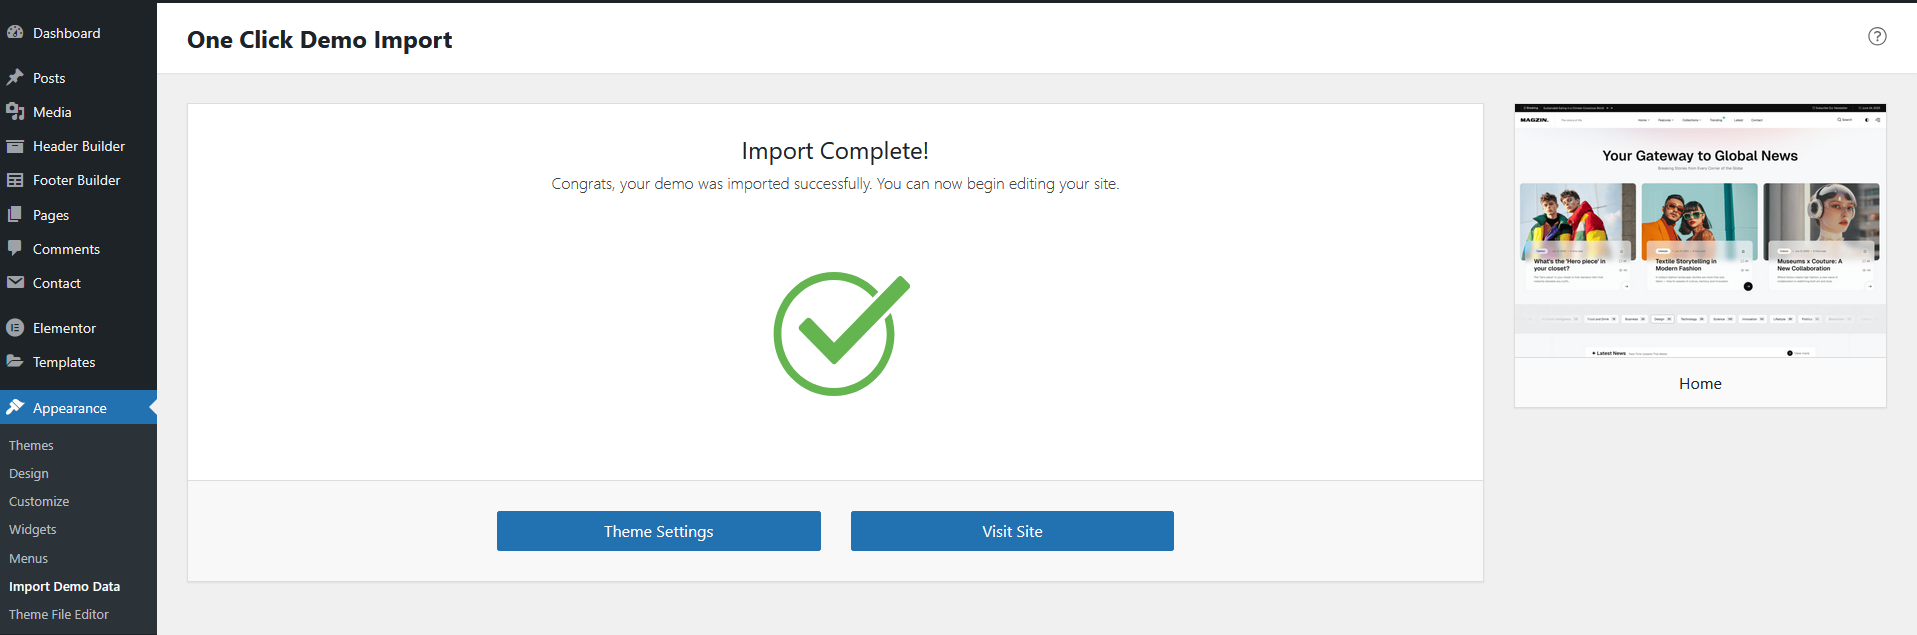
Wait a few minutes.
Manual Import Demo Data
In case you don’t want to import all demo data, you can choose to import specific parts as follows:
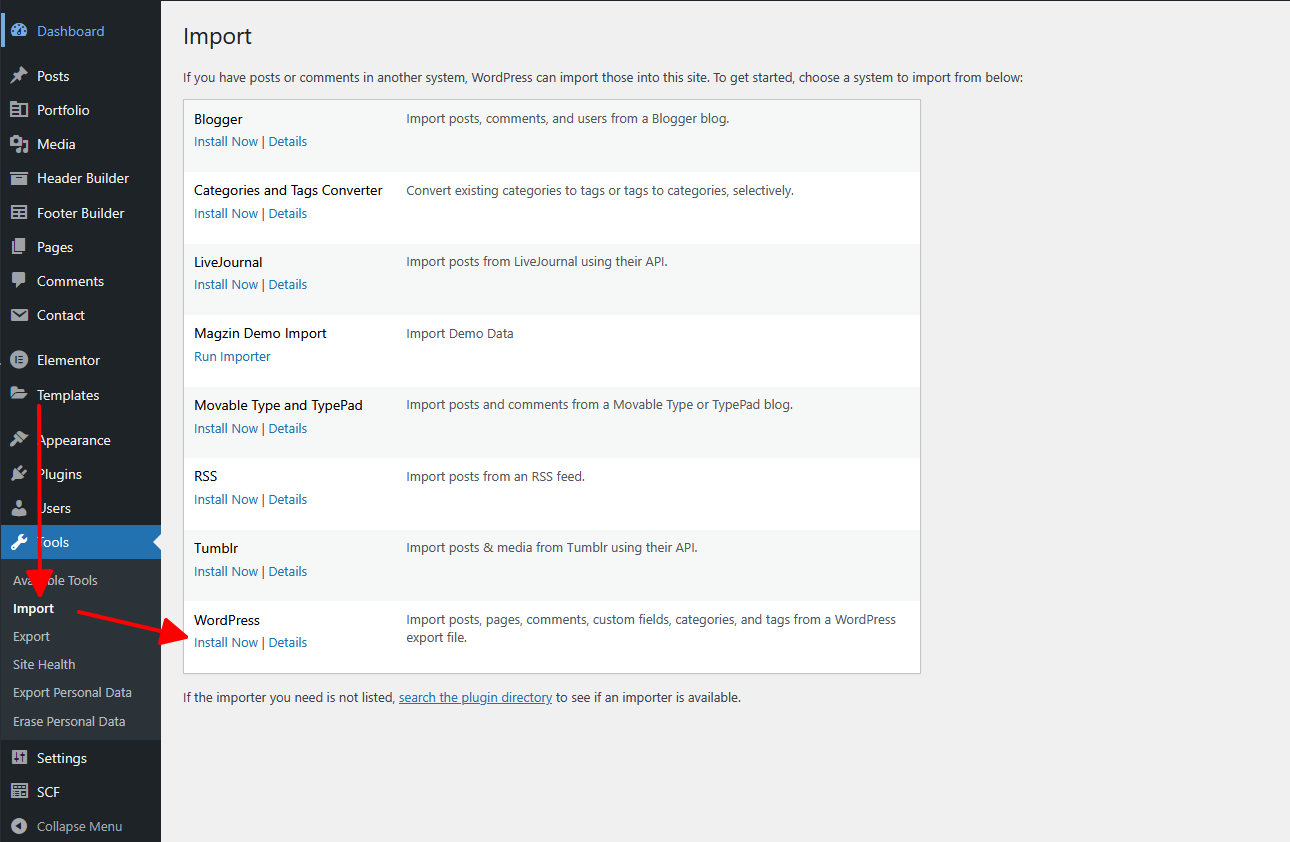
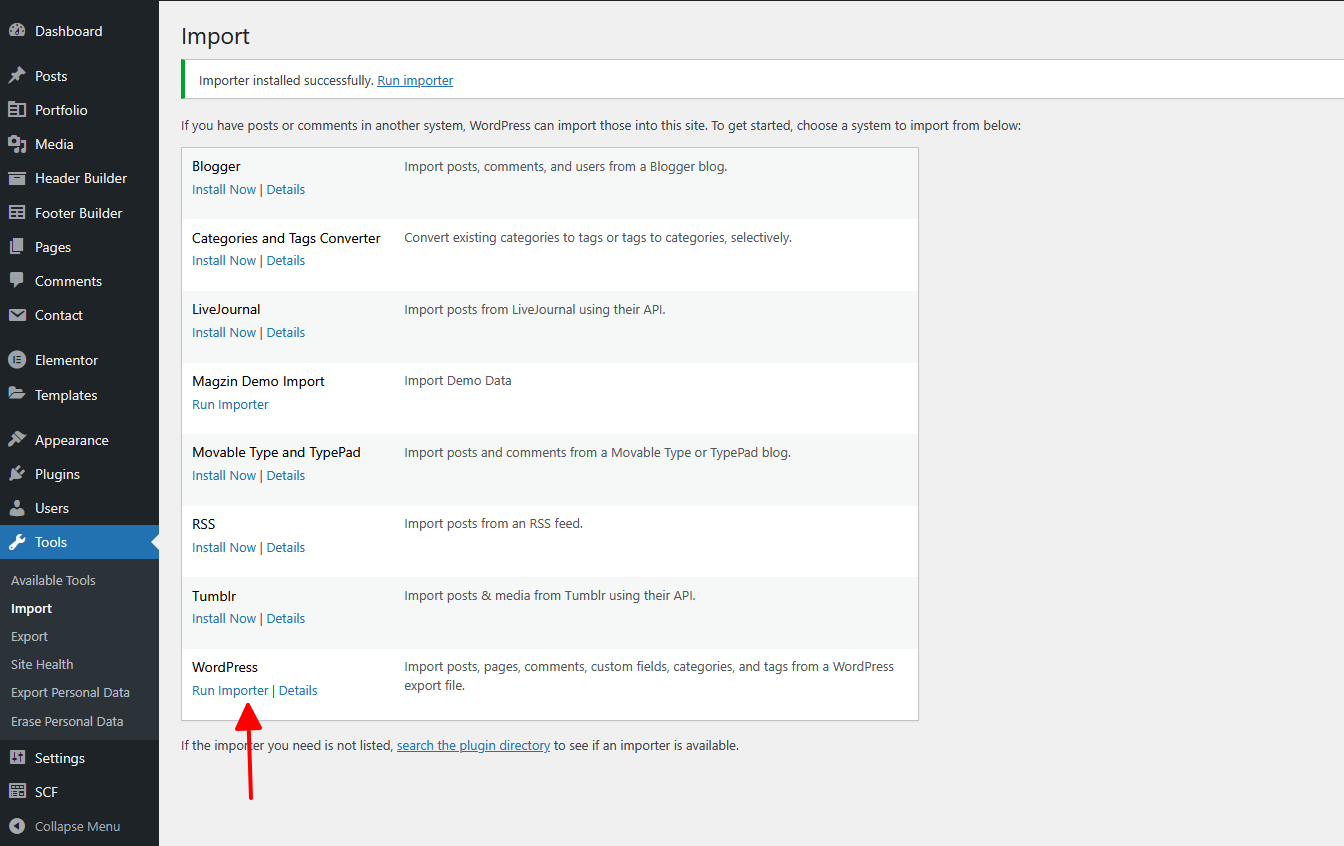
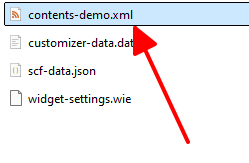
1. Import content data (posts, pages, categories, tags, media, etc.)
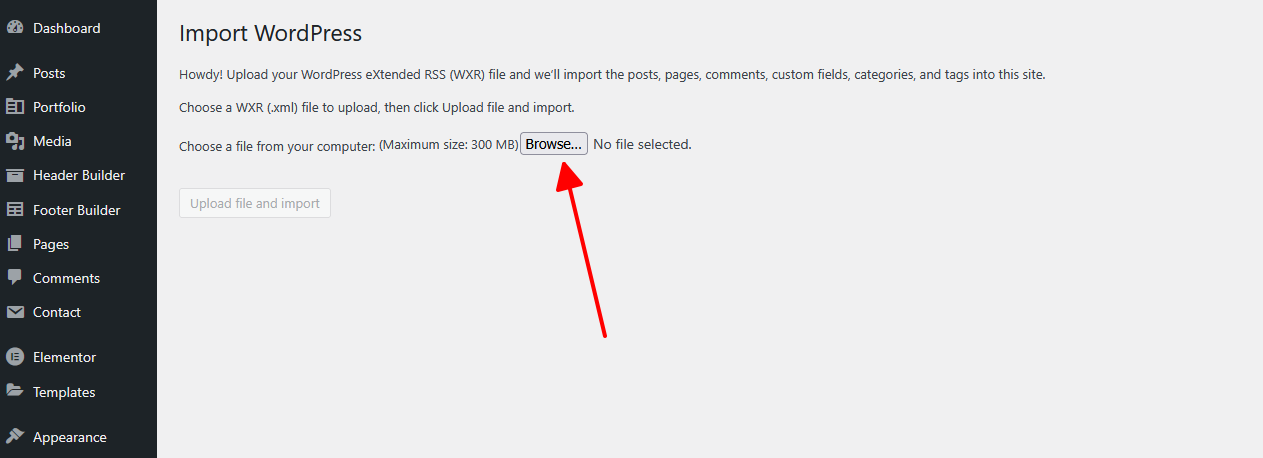
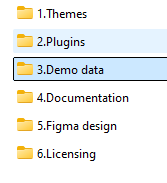
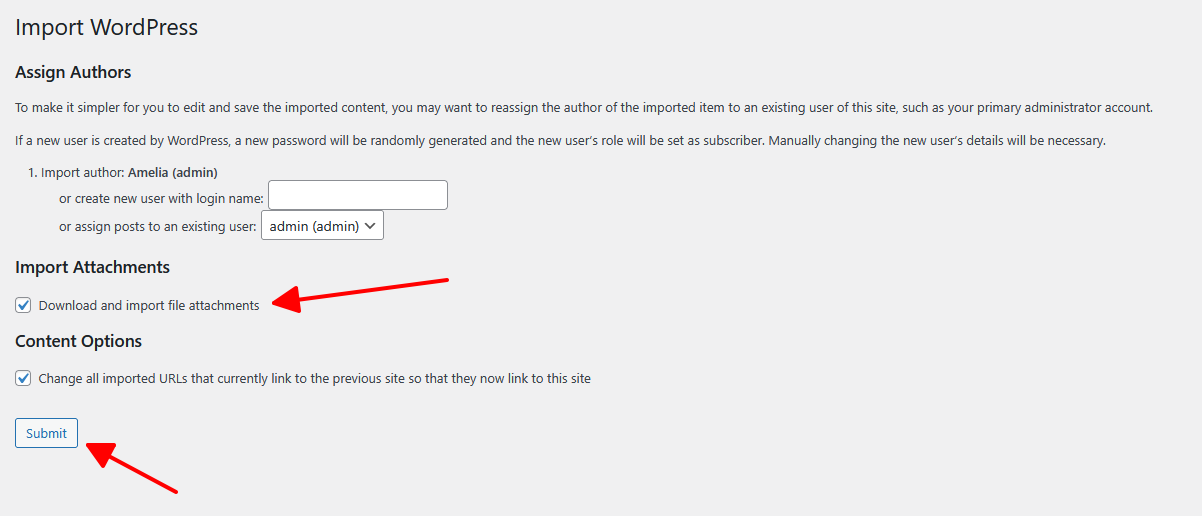
Go to Tools -> Import -> WordPress (click to Install Now) -> Run Importer -> Browse to 3.Demo data -> Choose contents-demo.xml -> Upload file and Import -> Check to " Download and import file attachments" -> Click Submit button
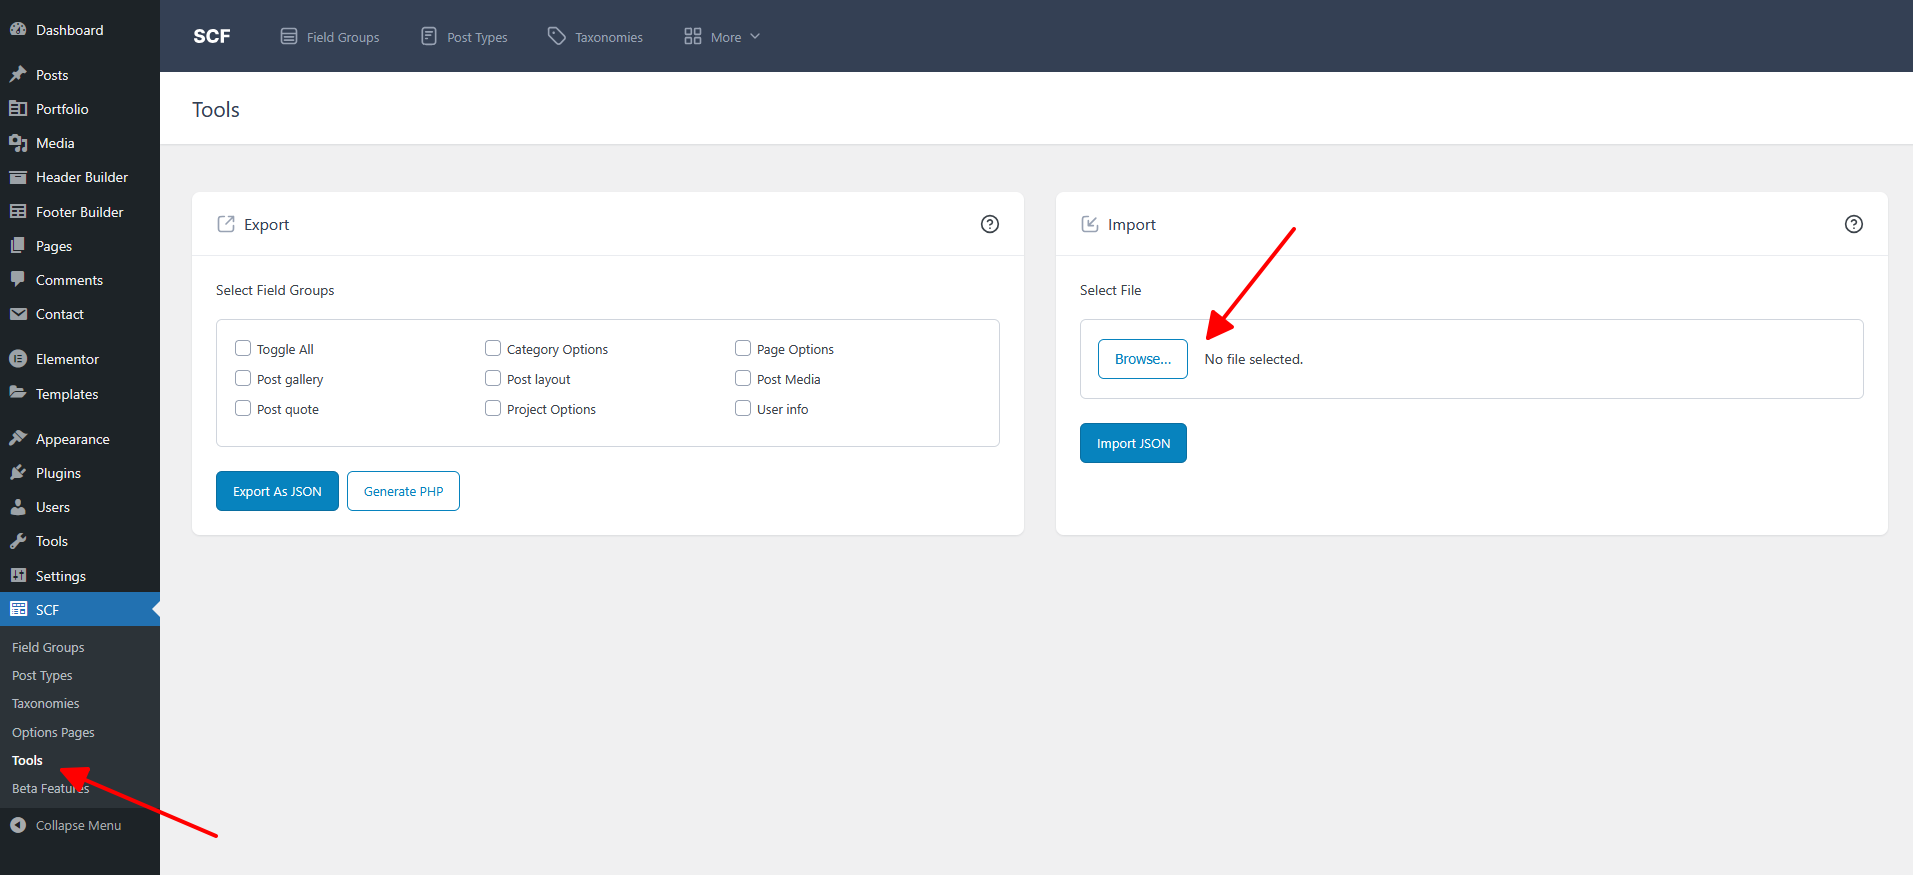
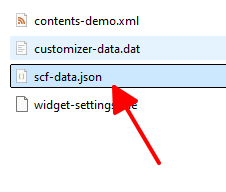
2. Import SCF config
Go to SCF -> Import -> Browse to 3.Demo data -> Choose scf-data.json -> Import JSON
Summary: Below are the steps we have completed.
- 1. Go to Appearance > Themes.
- 2. Click on Add New and then Click on Upload Theme .
- 3. Click Add New, then click Upload Theme > Choose File
- 4. Navigate to the magzin.zip file on your computer, then click Install Now
- 5. When the installation complete, click Activate. You will be redirected to Themes page with Magzin activated.
- 6. Click the Theme Register button, then enter your Envato Purchase code.
- 7. Install required plugins.
- 8. Import demo data. ( One click or Manual)
- Complete the setup process.
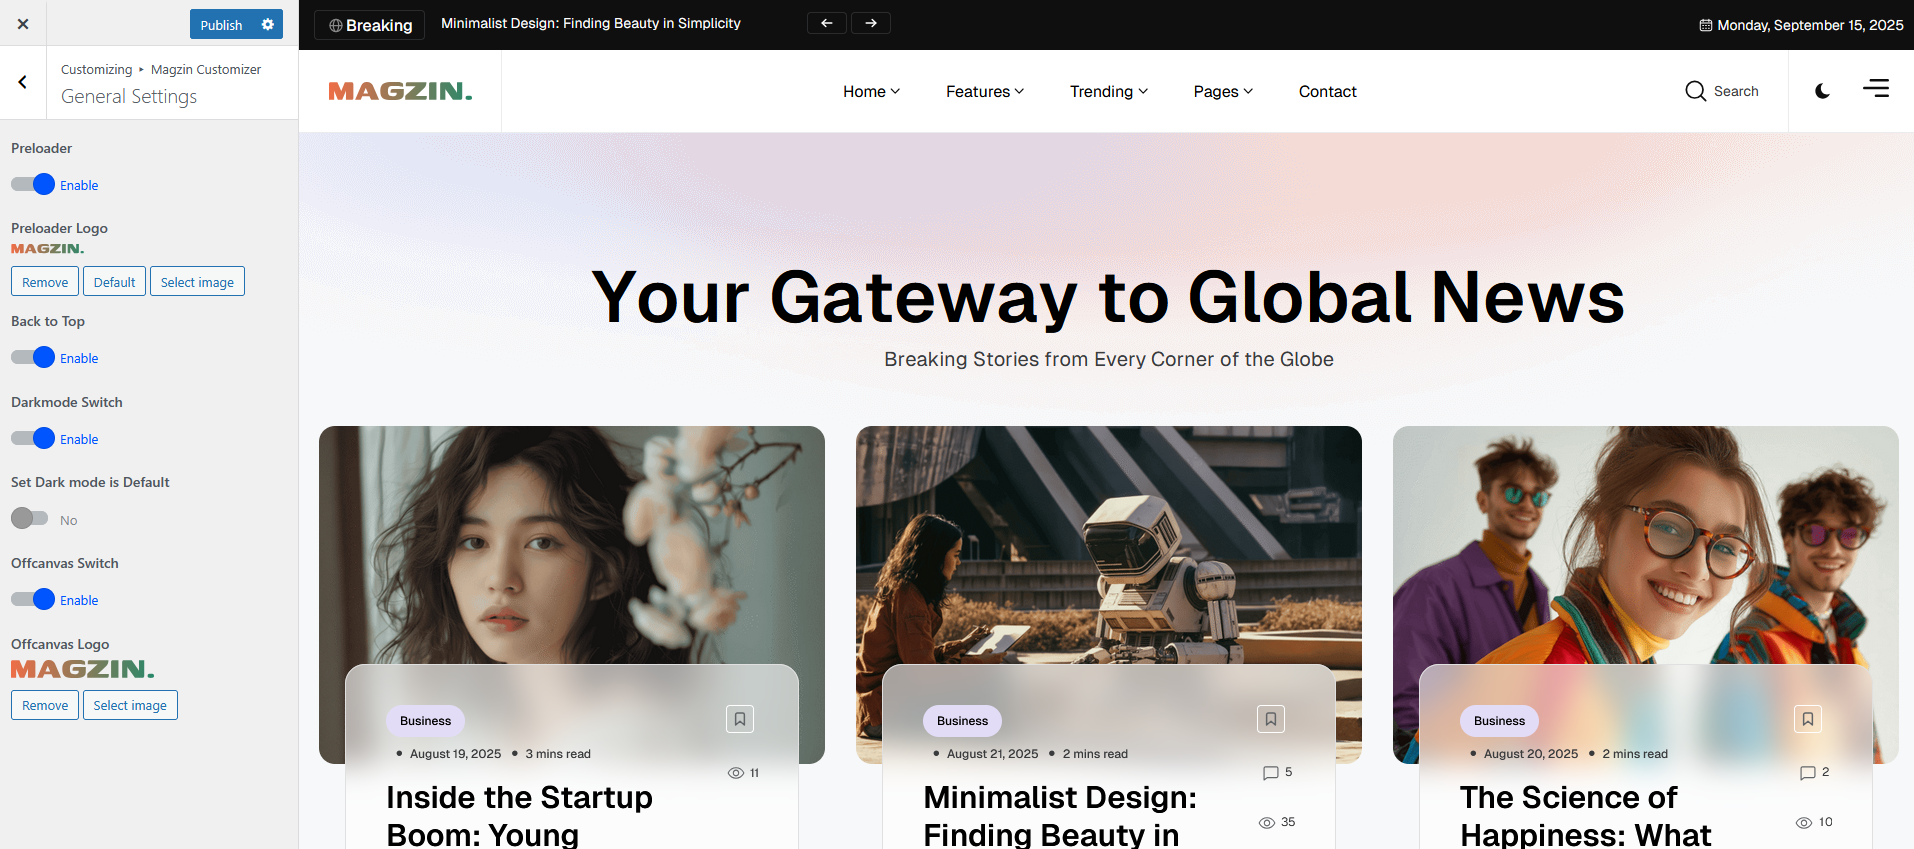
General Settings
You can enable or disable some elements such as Preloader, Offcanvas, Back to Top, or set Dark Mode as default. Go to Customize → Magzin Customizer → General Settings
Logo Settings
Go to Customize → Magzin Customizer → Logo Settings
![]()
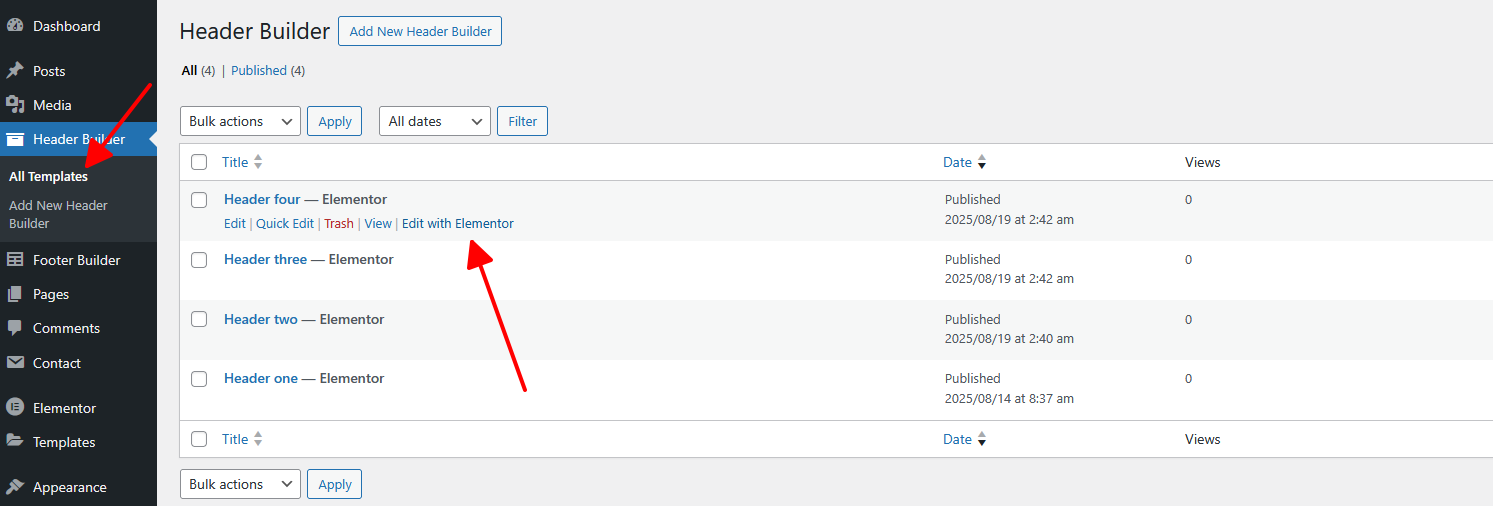
Header Builder
You can customize the Header. Go to: Header Builder -> All Templates -> Edit with Elementor.
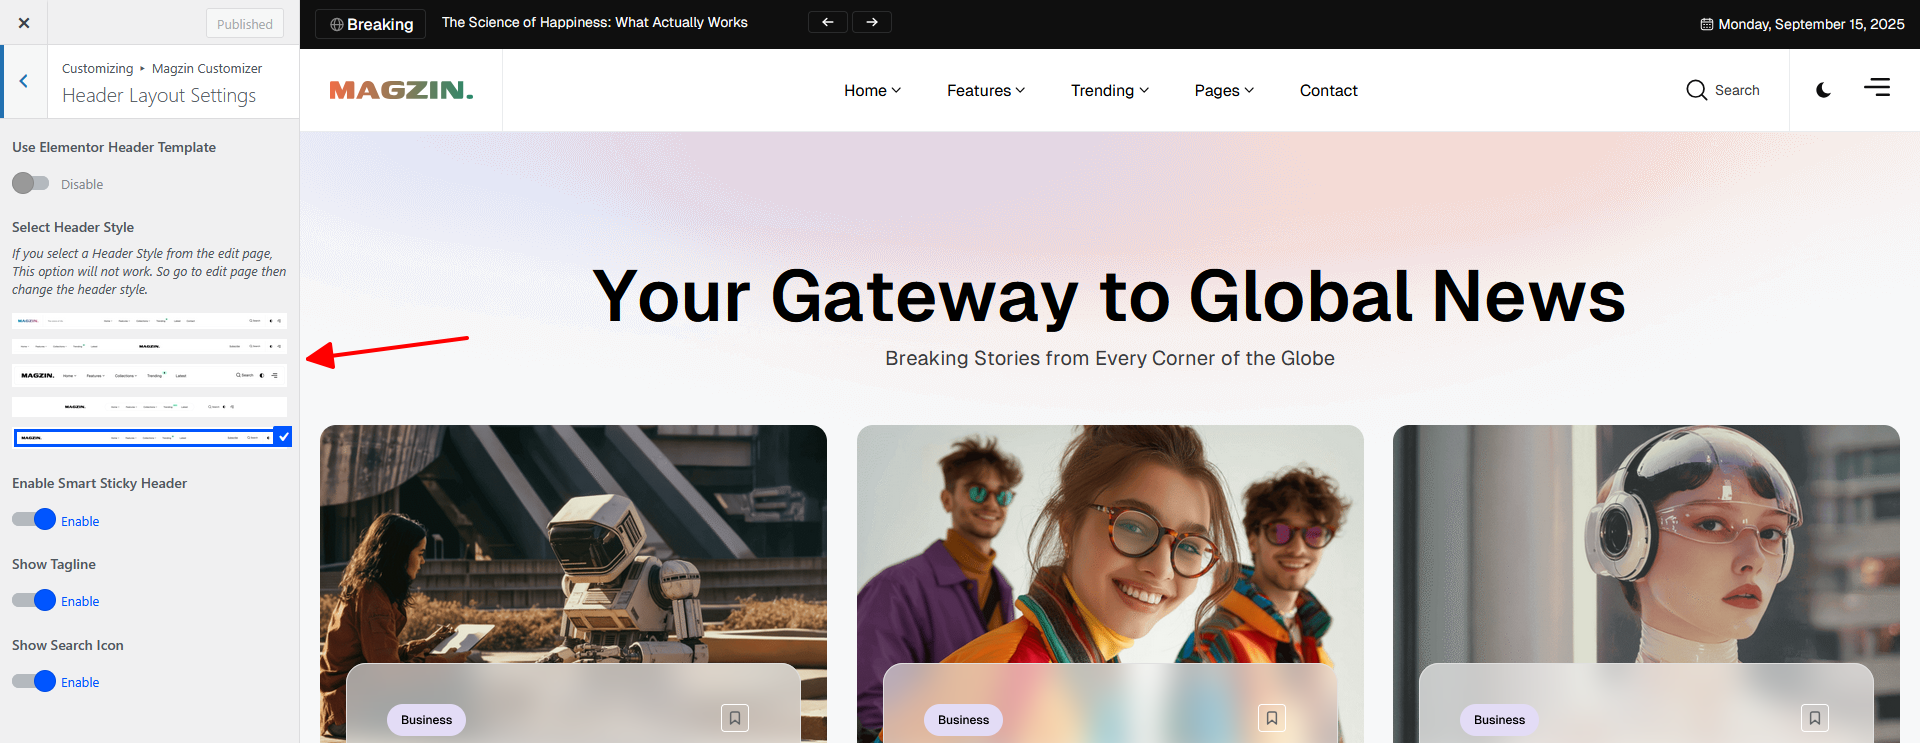
Select Header Style Globally
There’re different Header Style in Magzin. All of them can be configured in
Customize →
Magzin Customizer → Header Layout Settings → Select Header Style Globally
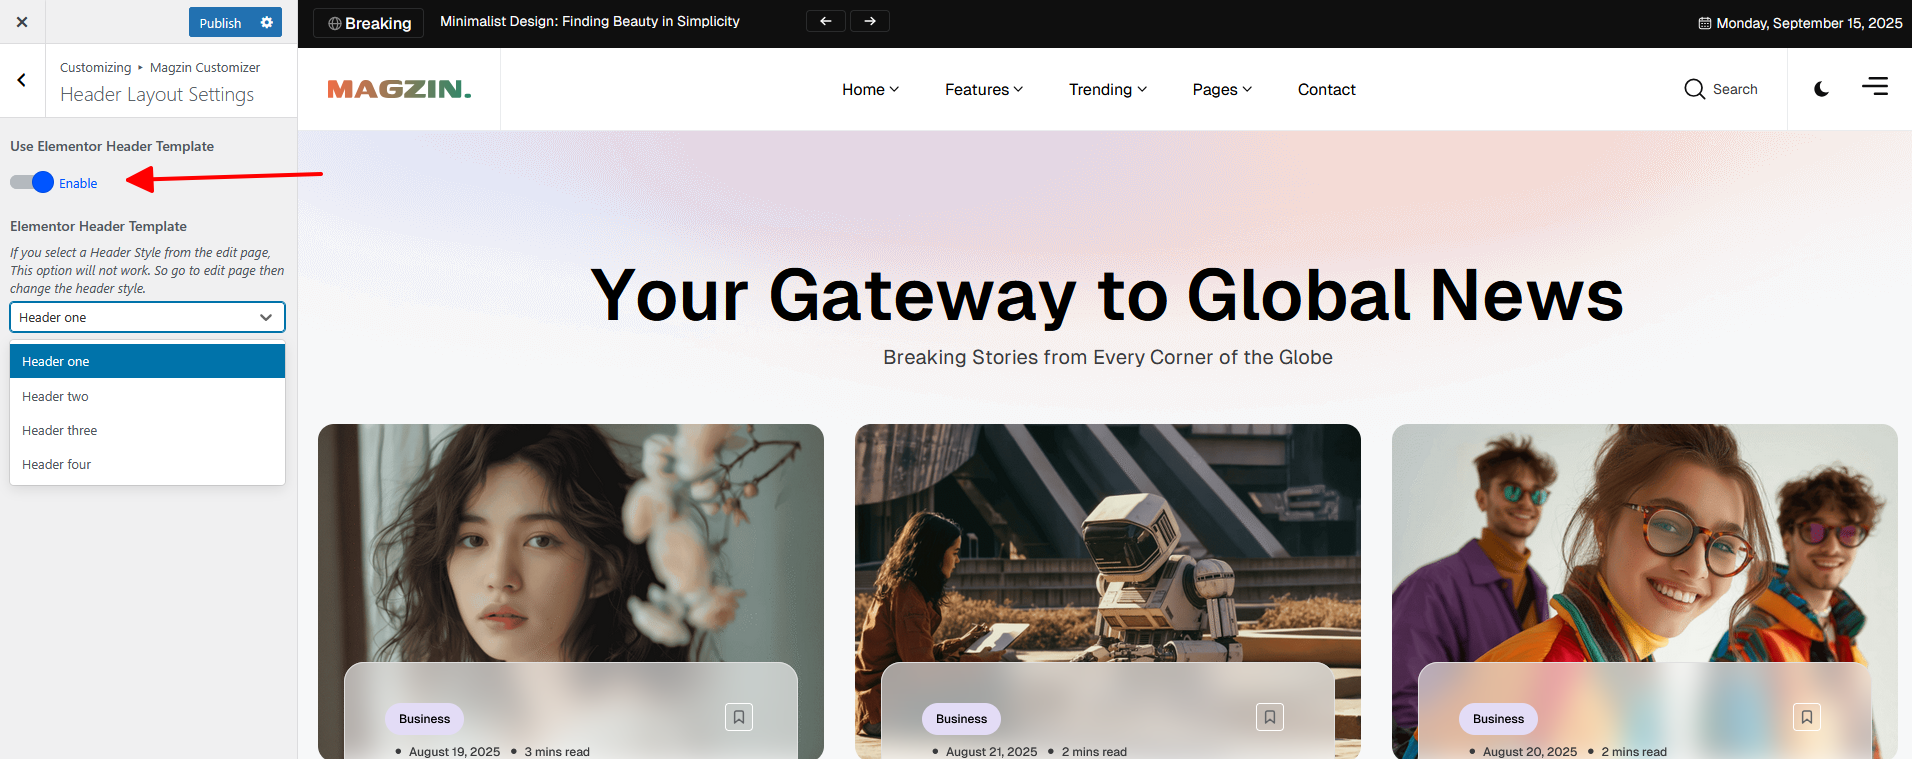
You can select the Elementor Header (created by the Header Builder).
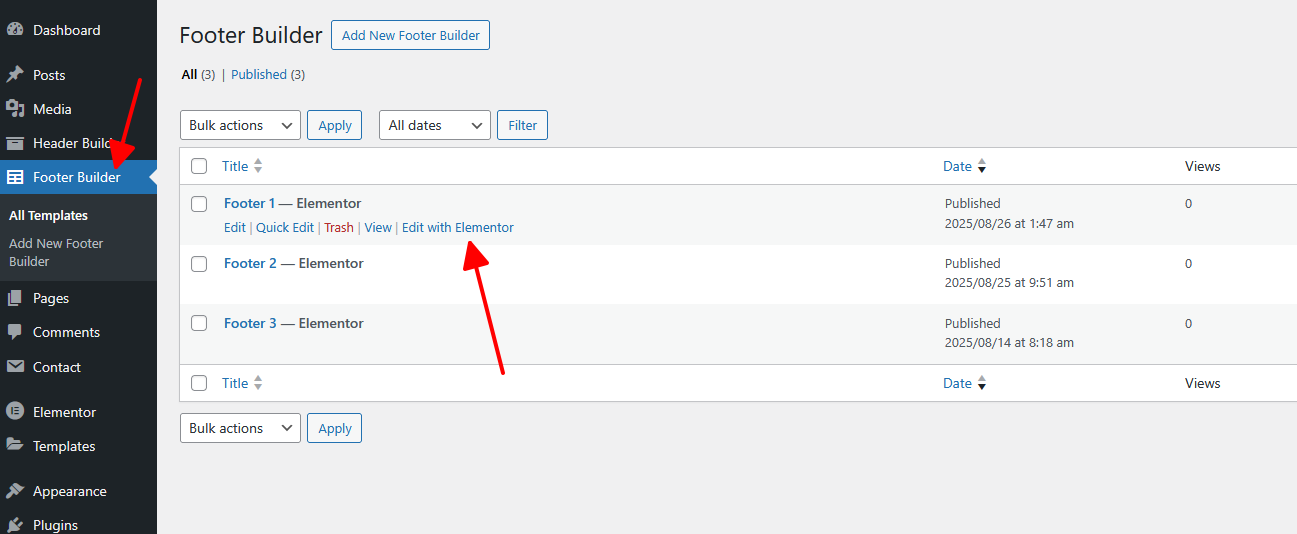
Footer Builder
There’re different Footer Style in Magzin. All of them can be configured in
Dashboard →
Footer Builder → Choose Footer Style → Edit with Elementor
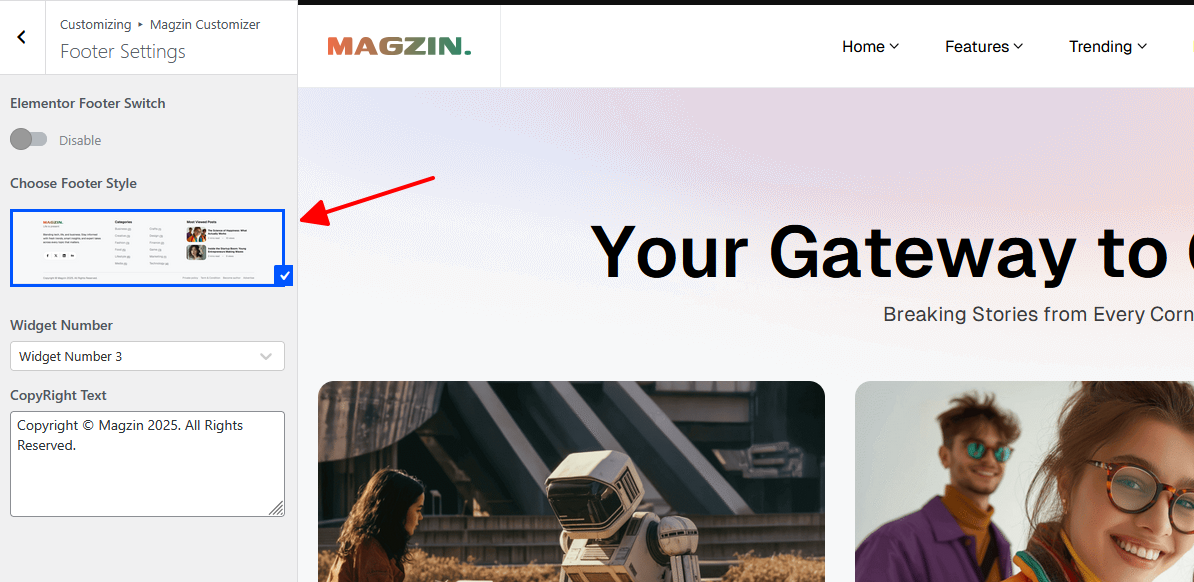
Select Footer Style Globally
There’re different Header Style in Magzin. All of them can be configured in
Customize →
Magzin Customizer → Footer Settings → Select Footer Style Globally
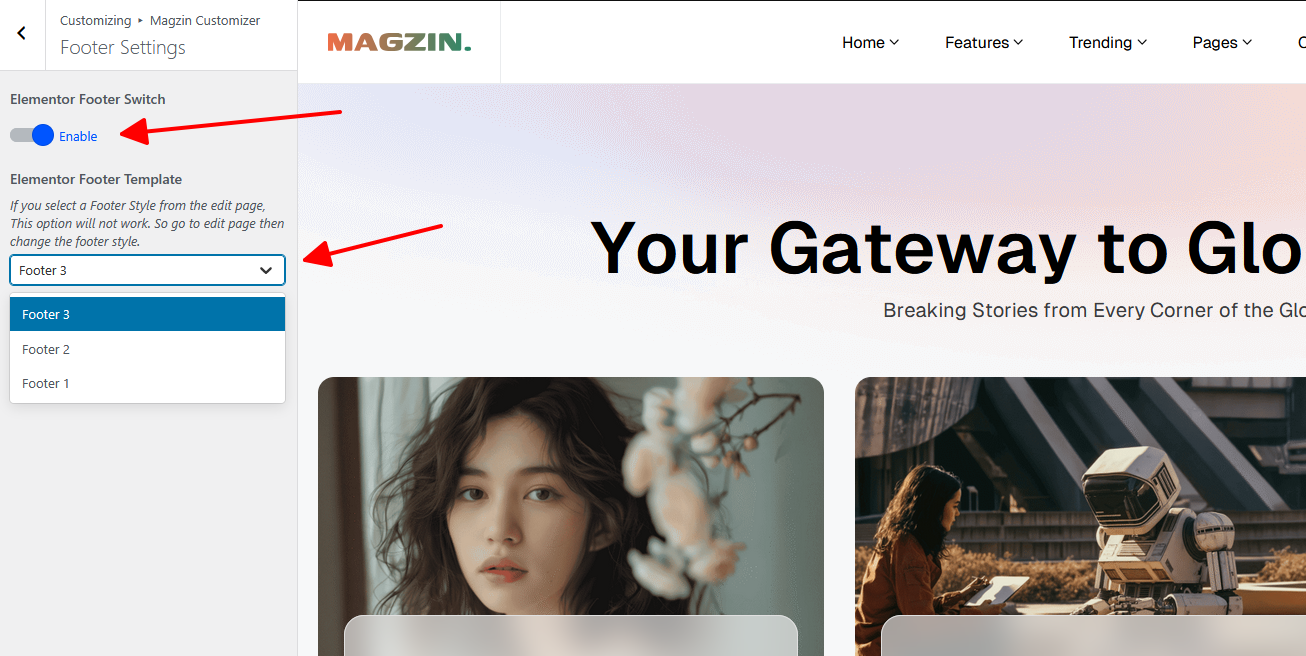
One great feature is that you can choose different Headers and Footers for each individual page. This gives you great flexibility.
How to Create a Menu
Setting up Navigation Menus works normally as it does for any WordPress theme. If you’re new to WordPress, you can learn more about menus in the WordPress Codex article.
- Go to Appearance → Menus in your admin sidebar and
click Create a new menu option..

- Select Create a new menu at the top of the page
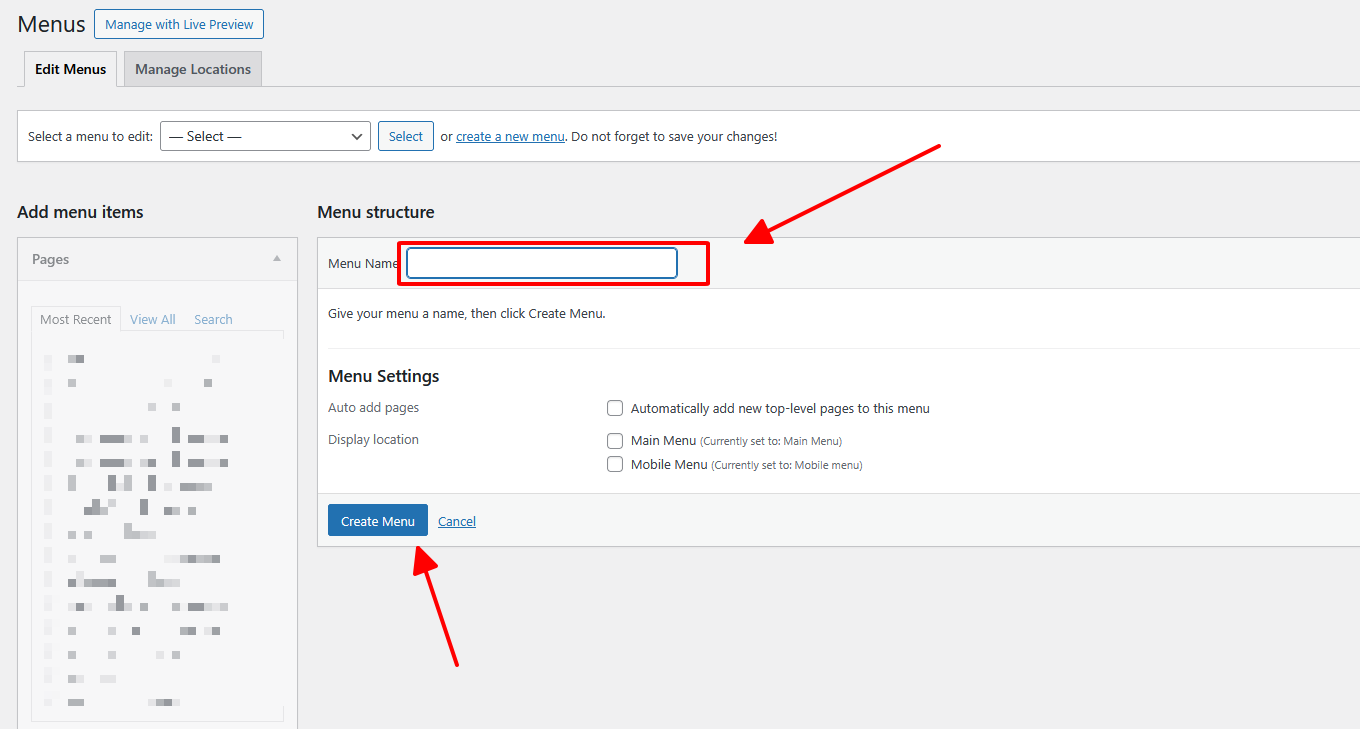
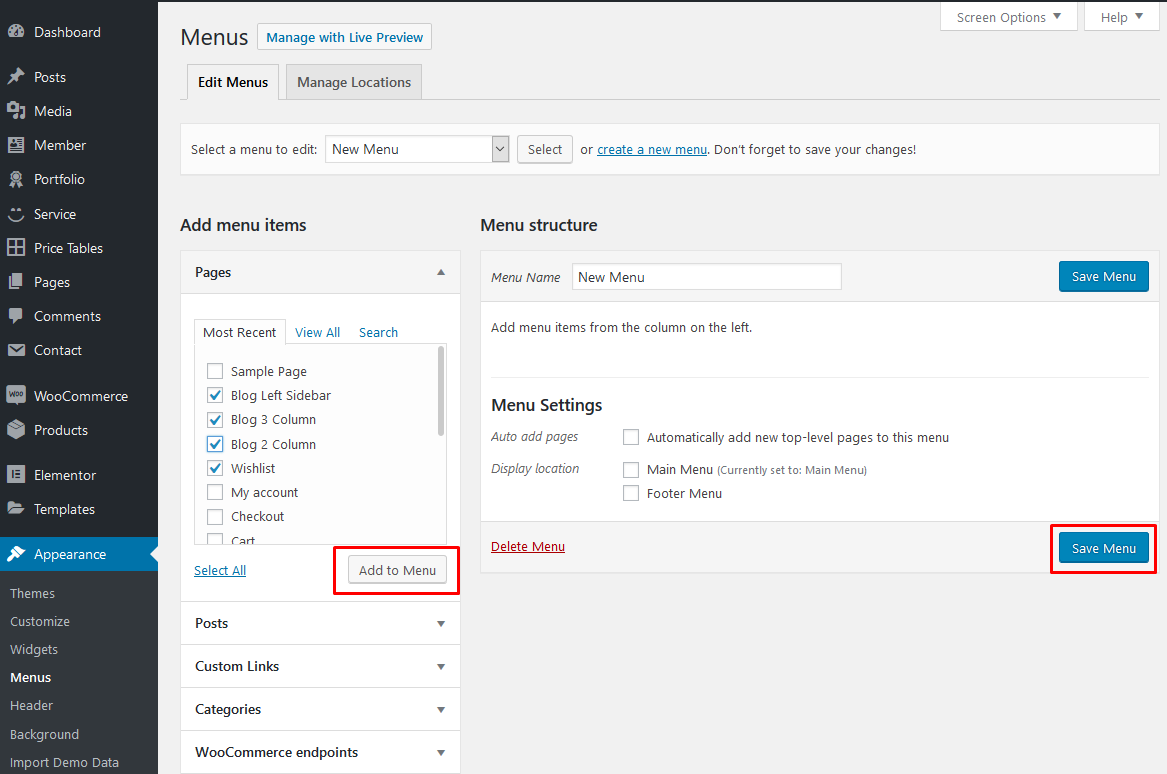
- Choose menu items you want to add from the left and hit Add to Menu. Then hit Save Menu
- Your new menu has been created:
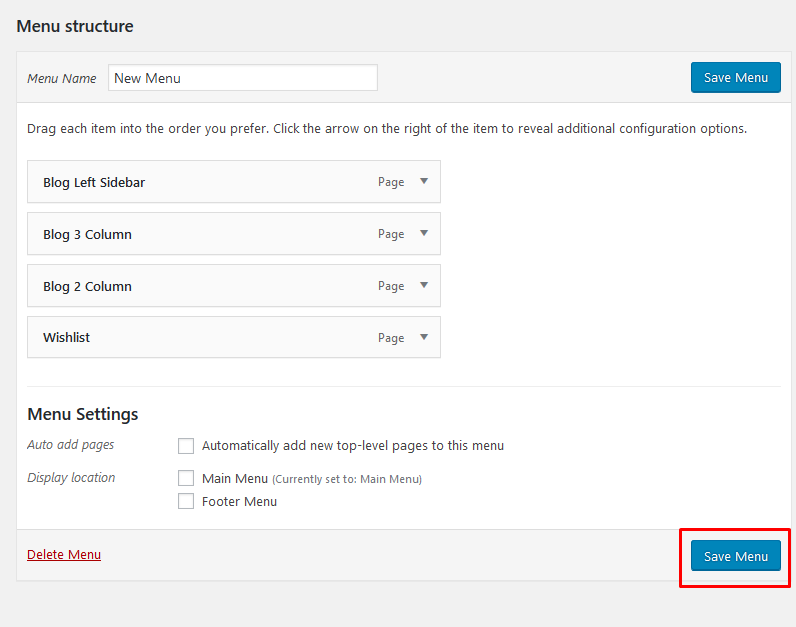
- Using the Custom Links and Pages boxes at the left, add items to the menu and drag and drop to arrange them.
- If you would like to use this menu in the primary navigation of the theme, scroll down
to the Menu Settings area, enable the checkbox next to the Main Menu menu locations.
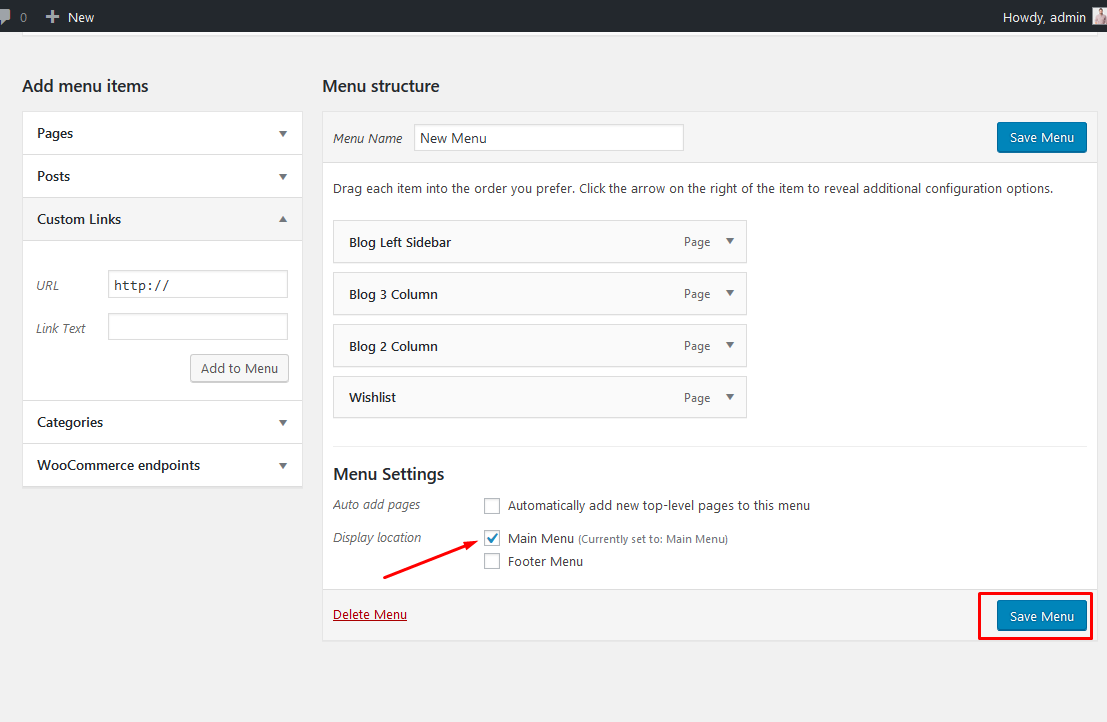
- Click Save Menu and that is all.
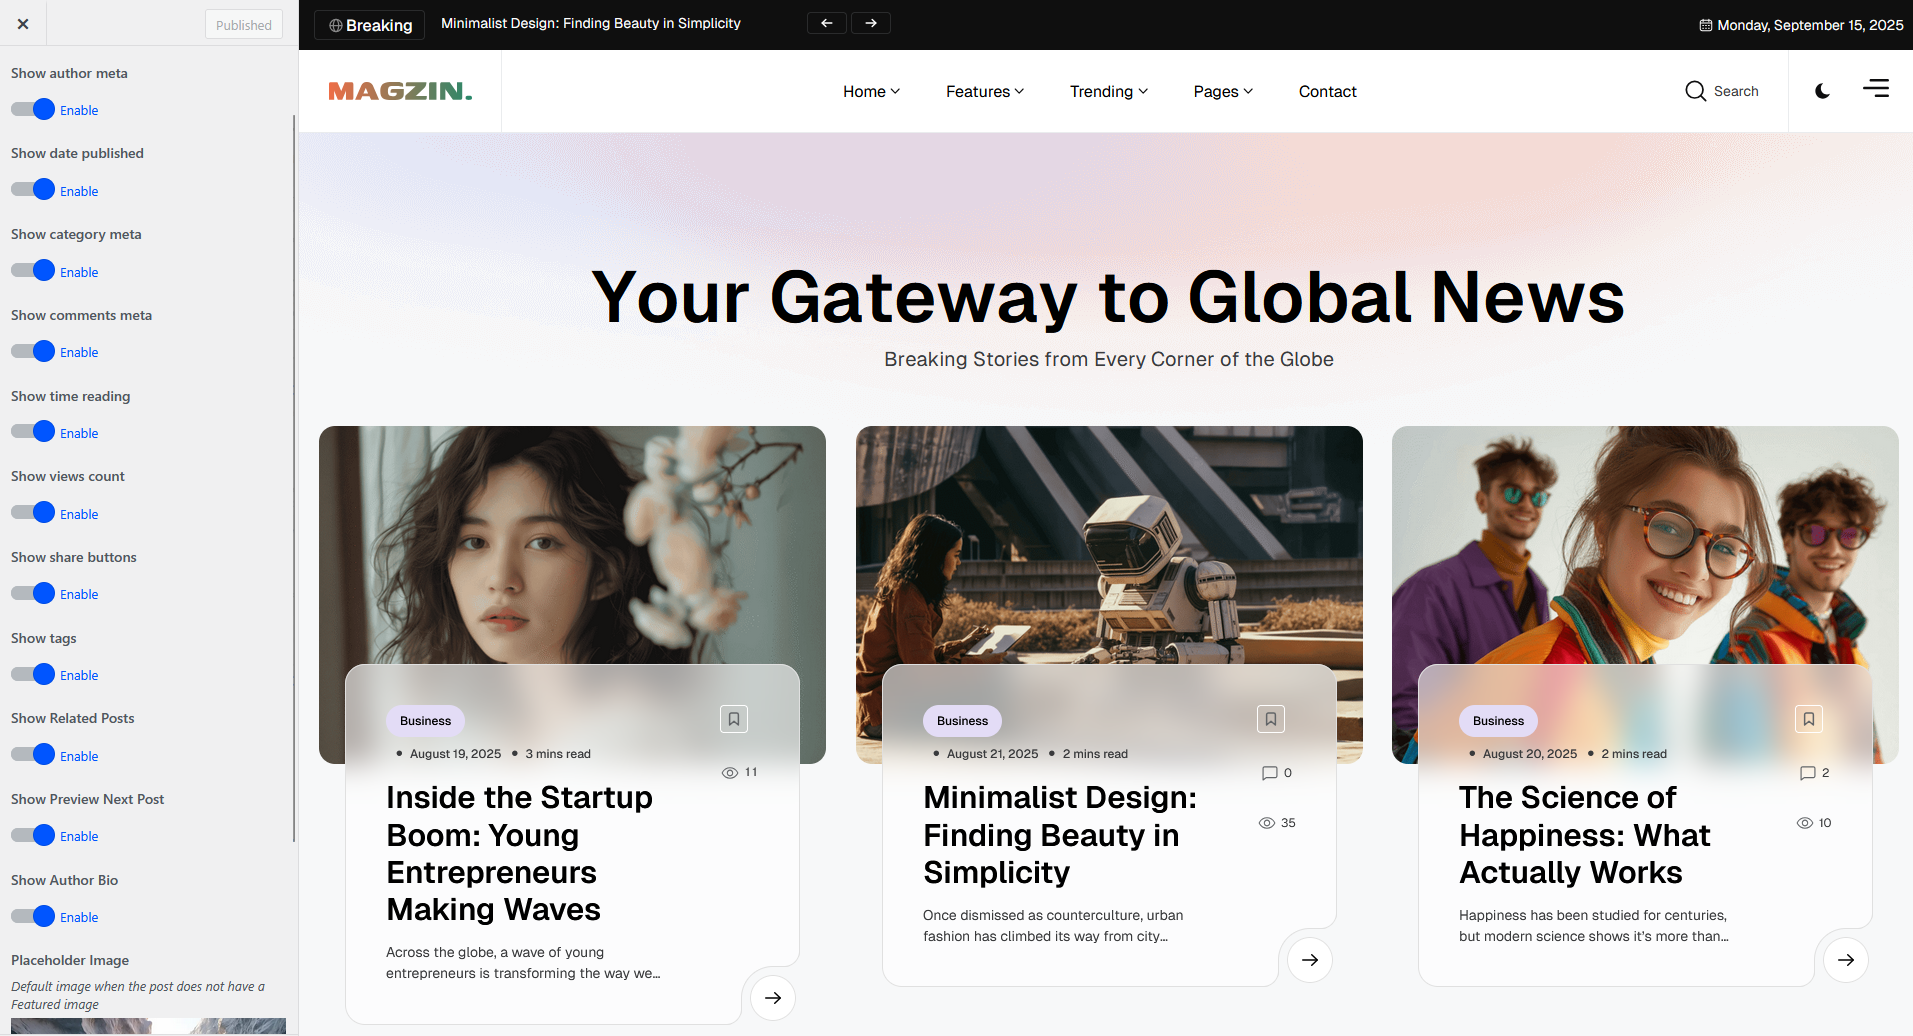
Blog Settings
There are many options available for the Blog such as: Author / Date / Category / Comments / Reading Time / Views Count / Share / Tags / Related / Navigation...
Go to Customize → Magzin Customizer → Blog Settings
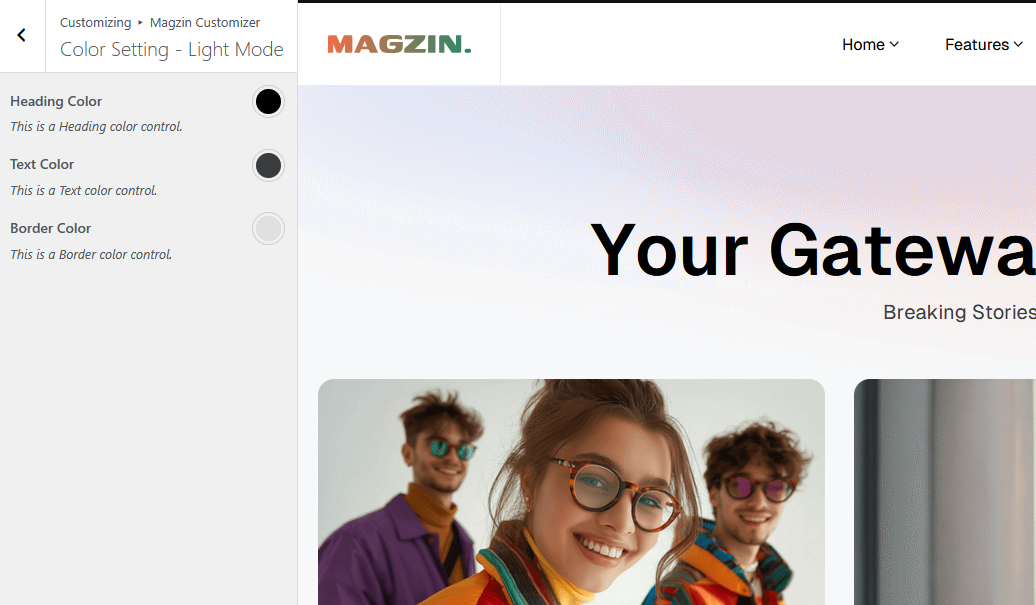
Color Settings
Go to Customize → Magzin Customizer → Color Settings
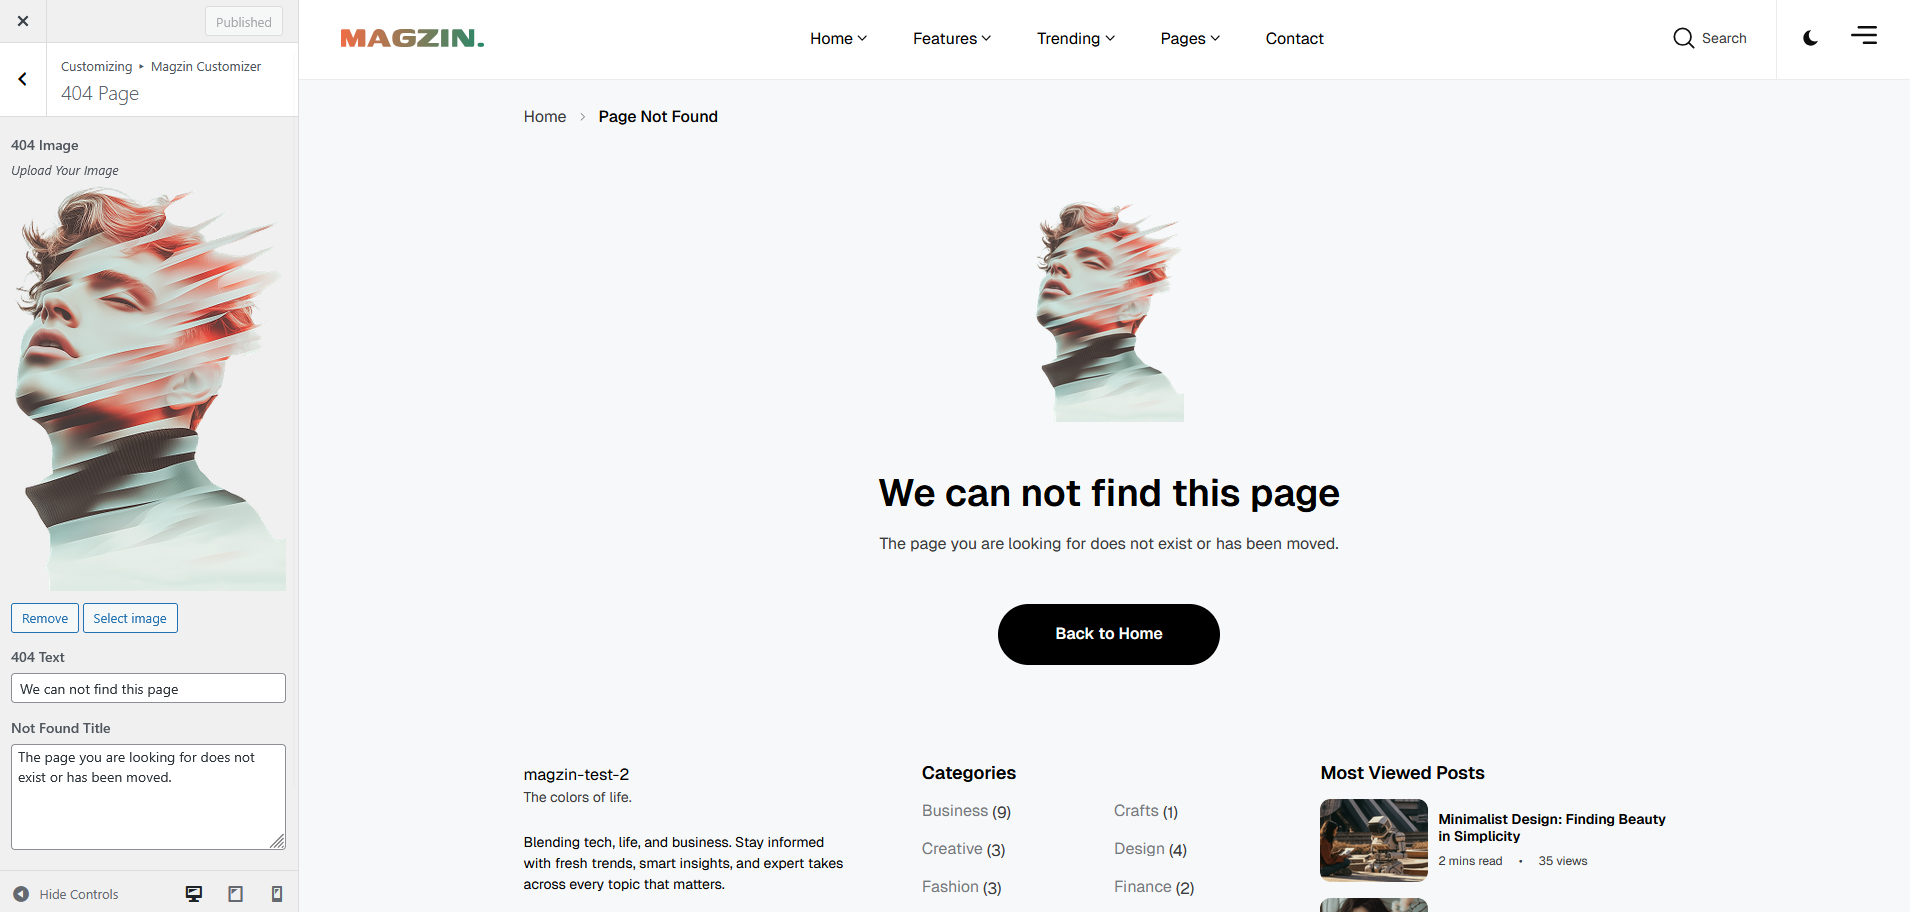
404 Page Settings
Go to Customize → Magzin Customizer → 404 Settings
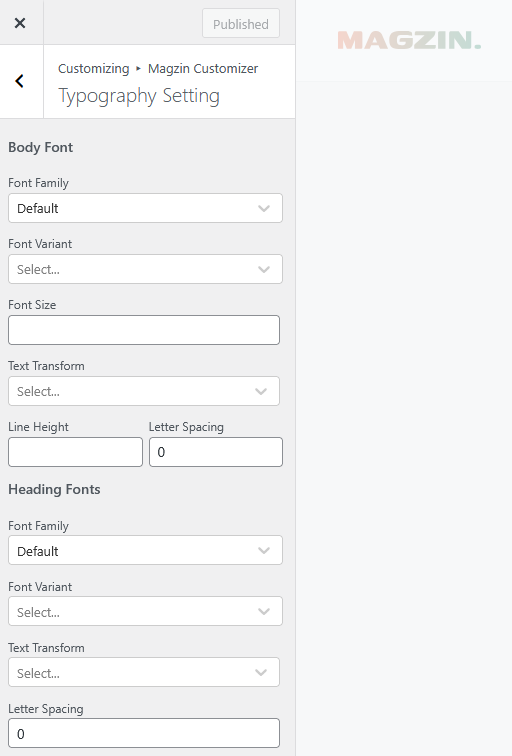
Typography Setting
Go to Customize → Magzin Customizer → Typography Setting
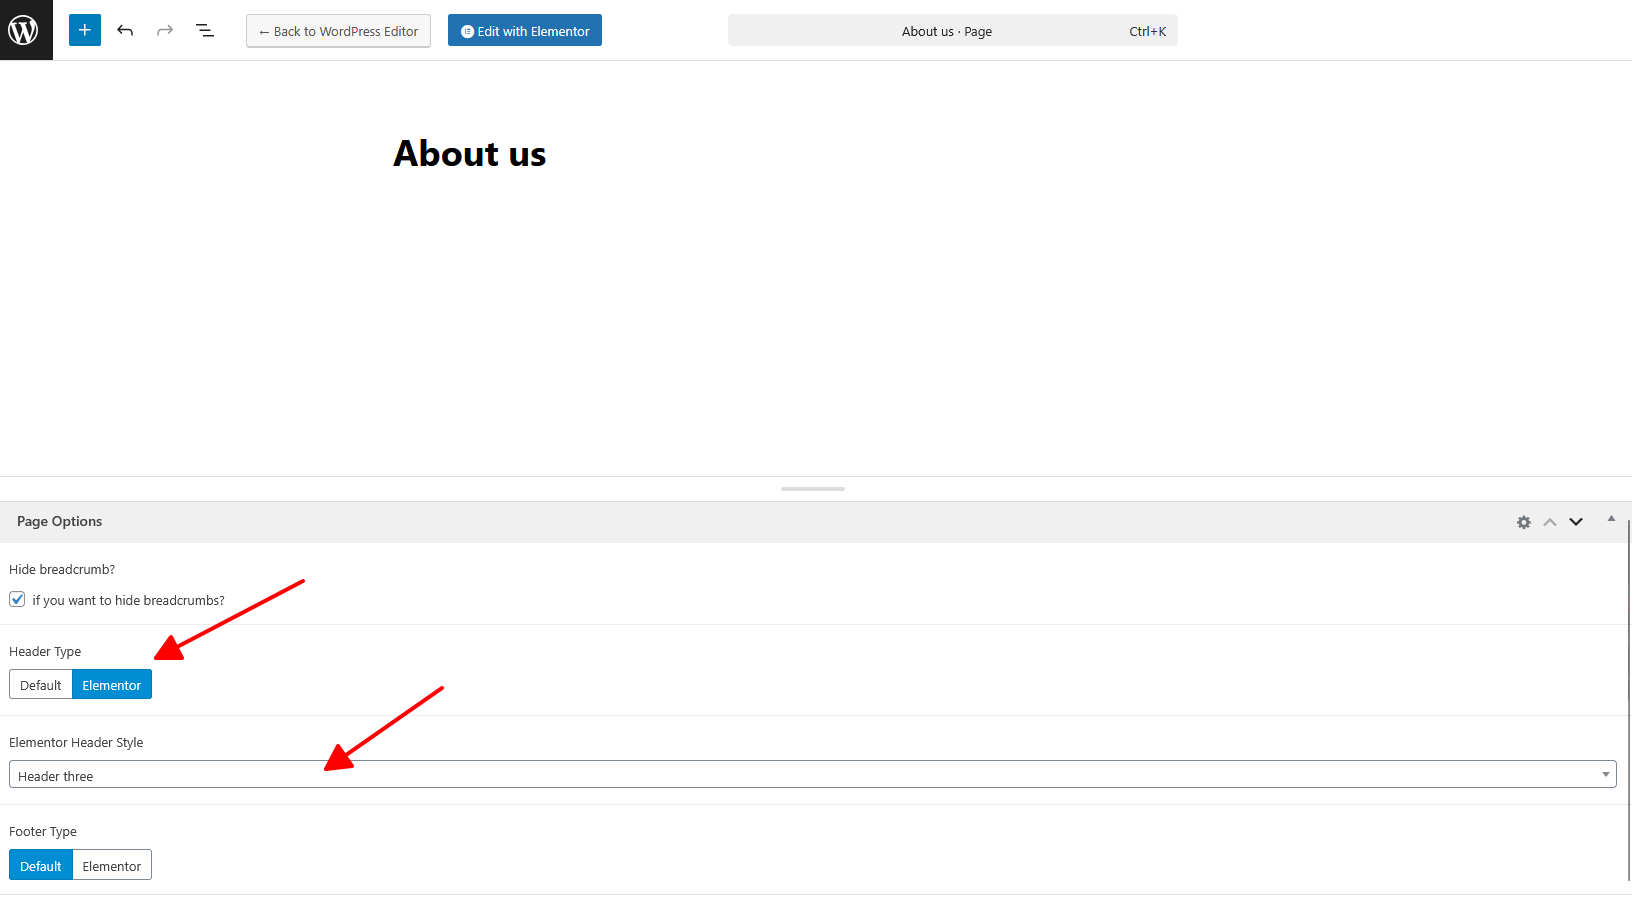
Page Options
On each page you'll see a Template Settings metabox, located below the page content editor. This metabox includes various options to control the header style , footer visibility and Logo Setting on each page.
Create a New Page
Step 1: Navigate to Pages in your admin sidebar and click Add New option.

Step 2: Enter a new name for your page, then find the Page Attributes box on right side to set your Parent or Template page.
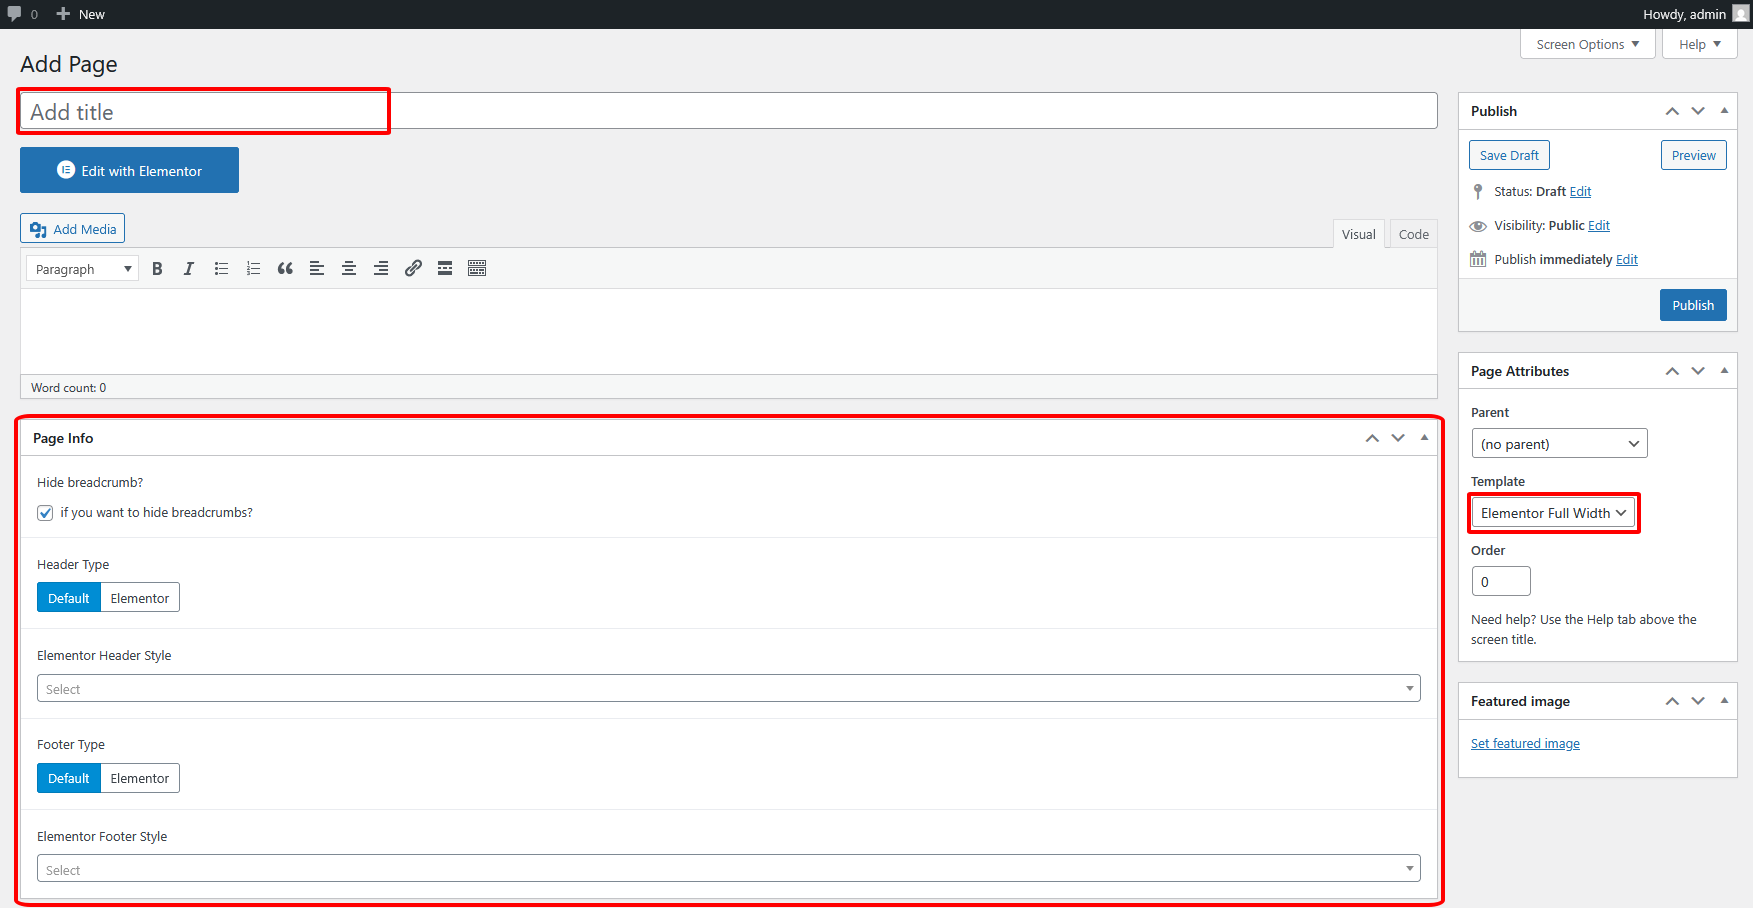
Step 3: in Page info, you can choose custom header and footer for this page. You can show or hide breadcrumb.
Use Elementor Page Builder to Build Page
Step 1: Choose Edit With Elementor to edit your page.
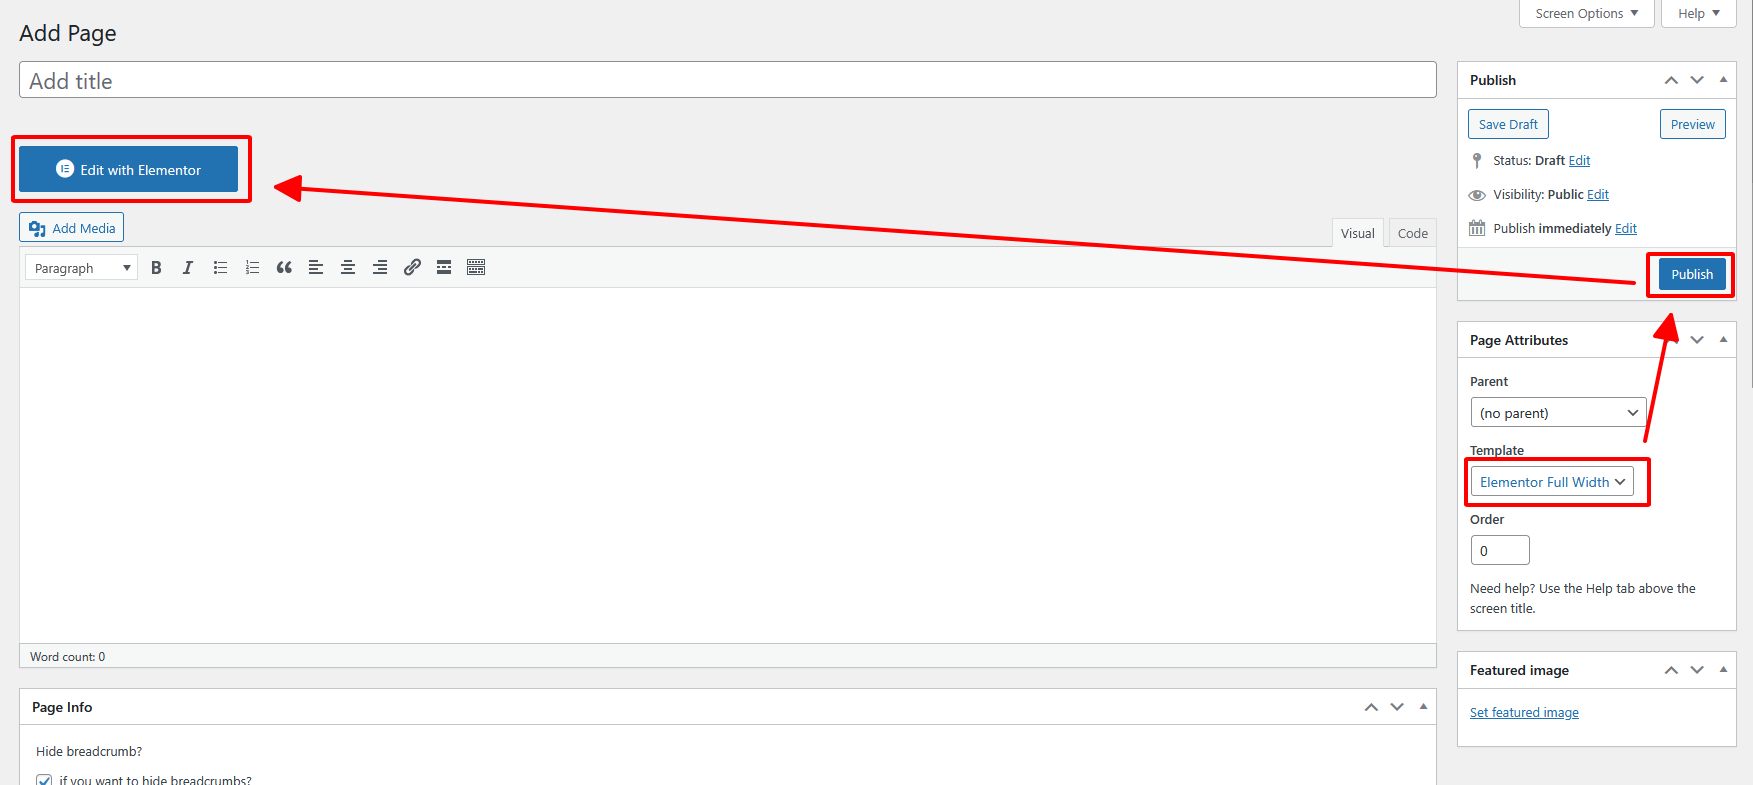
Step 2: Choose Add Element to start adding our premade elements to your new page.

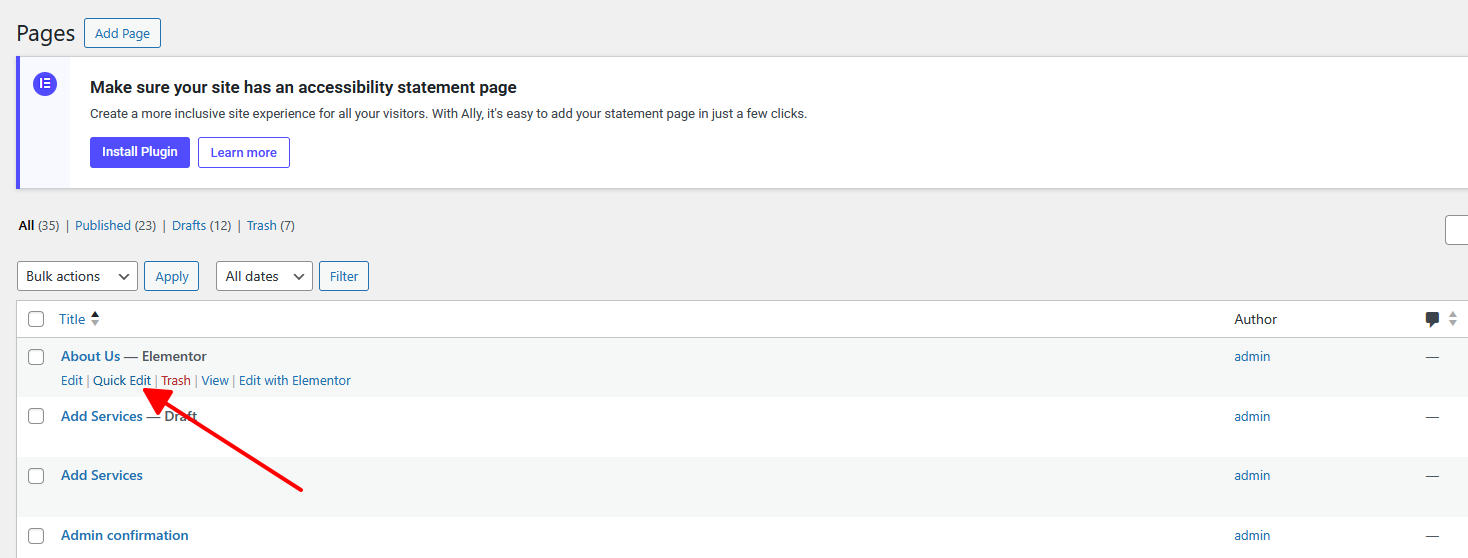
How to Change Page Title
Step 1: Go to Pages > All Pages. Then point at the page you want to edit. You will see the Quick Edit option.
Step 2: Edit the title as you want. Delete the current slug. Then hit Update. It will automatically generate new slug for your page.
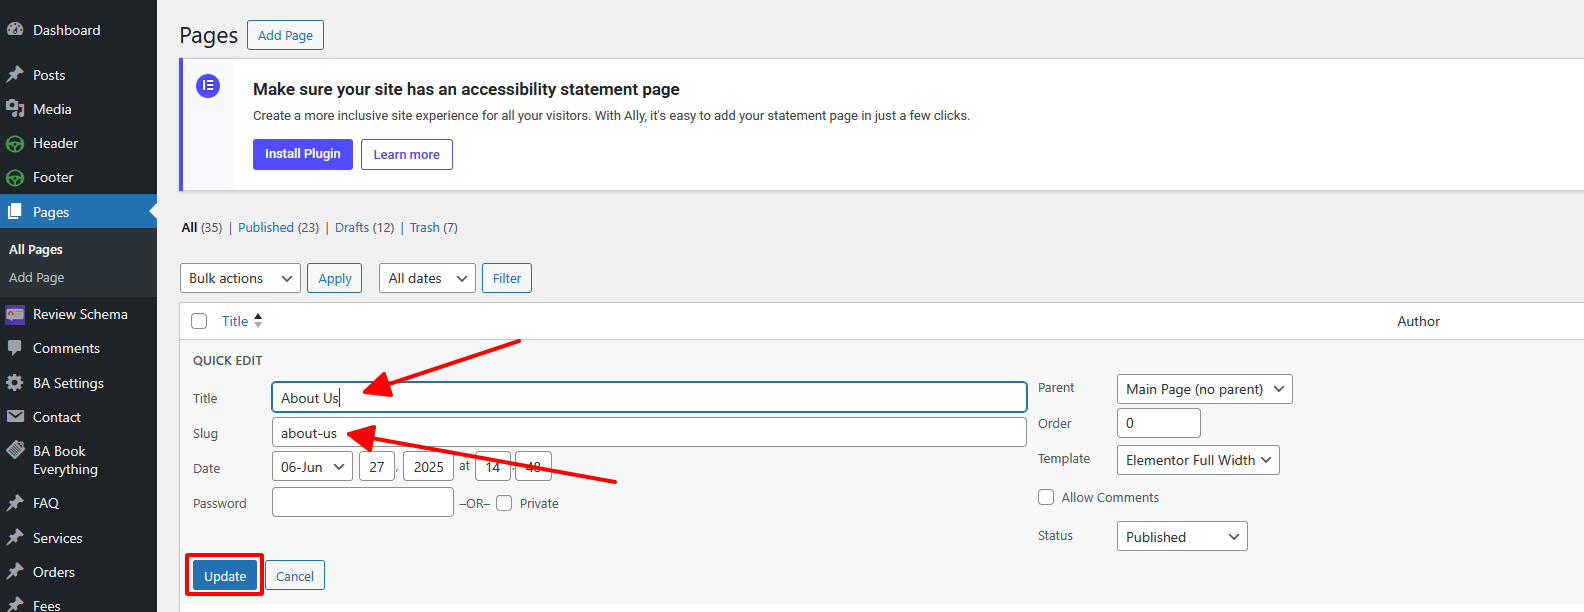
You can also edit some other options such as parent, template, status... If you want to edit more options, hit Edit instead of Quick Edit.
Contact Form Setup
Overflow comes with integrated support for the Contact Form 7 plugin:
Contact Form for Contact Page

Copy the shortcode Paste it everywhere then you will get a contact form

How to Create a New Post
Step 1: Navigate to Posts > Add New in your WordPress admin sidebar.
Step 2: Create a title, and insert your post content in the editing field.
Step 3: For a video/audio post, just simply paste the video/audio URL into the Embed Code field.
Step 4: Add Categories from the right side. Categories is meta information you create for the post. Each category is a meta link that your viewer can click to view similar type of posts. To assign it to the post, check the box next to the Category name. You can also access and edit Categories from the Post sidebar item in your WordPress admin sidebar.
Step 5: Add Tags from the right side. Tags is meta information you create for the post. Each tag is a link that your viewer can click to view similar type of posts. Type the name of the tag in the field, separate multiple tags with commas. You can also access and edit Tags from the Post sidebar item in your WordPress admin sidebar.
Step 6: For a single image, click the first Featured Image Box, select an image and click the Set Featured Image button.
Step 7: You can also customize Page Title & Sidebar Options in Settings.
Step 8: Once you are finished, click Publish to save the post.
Here is the screenshot that shows the various areas of the blog post page:

There are many options for Header and Post formats to showcase your post in an impressive way.
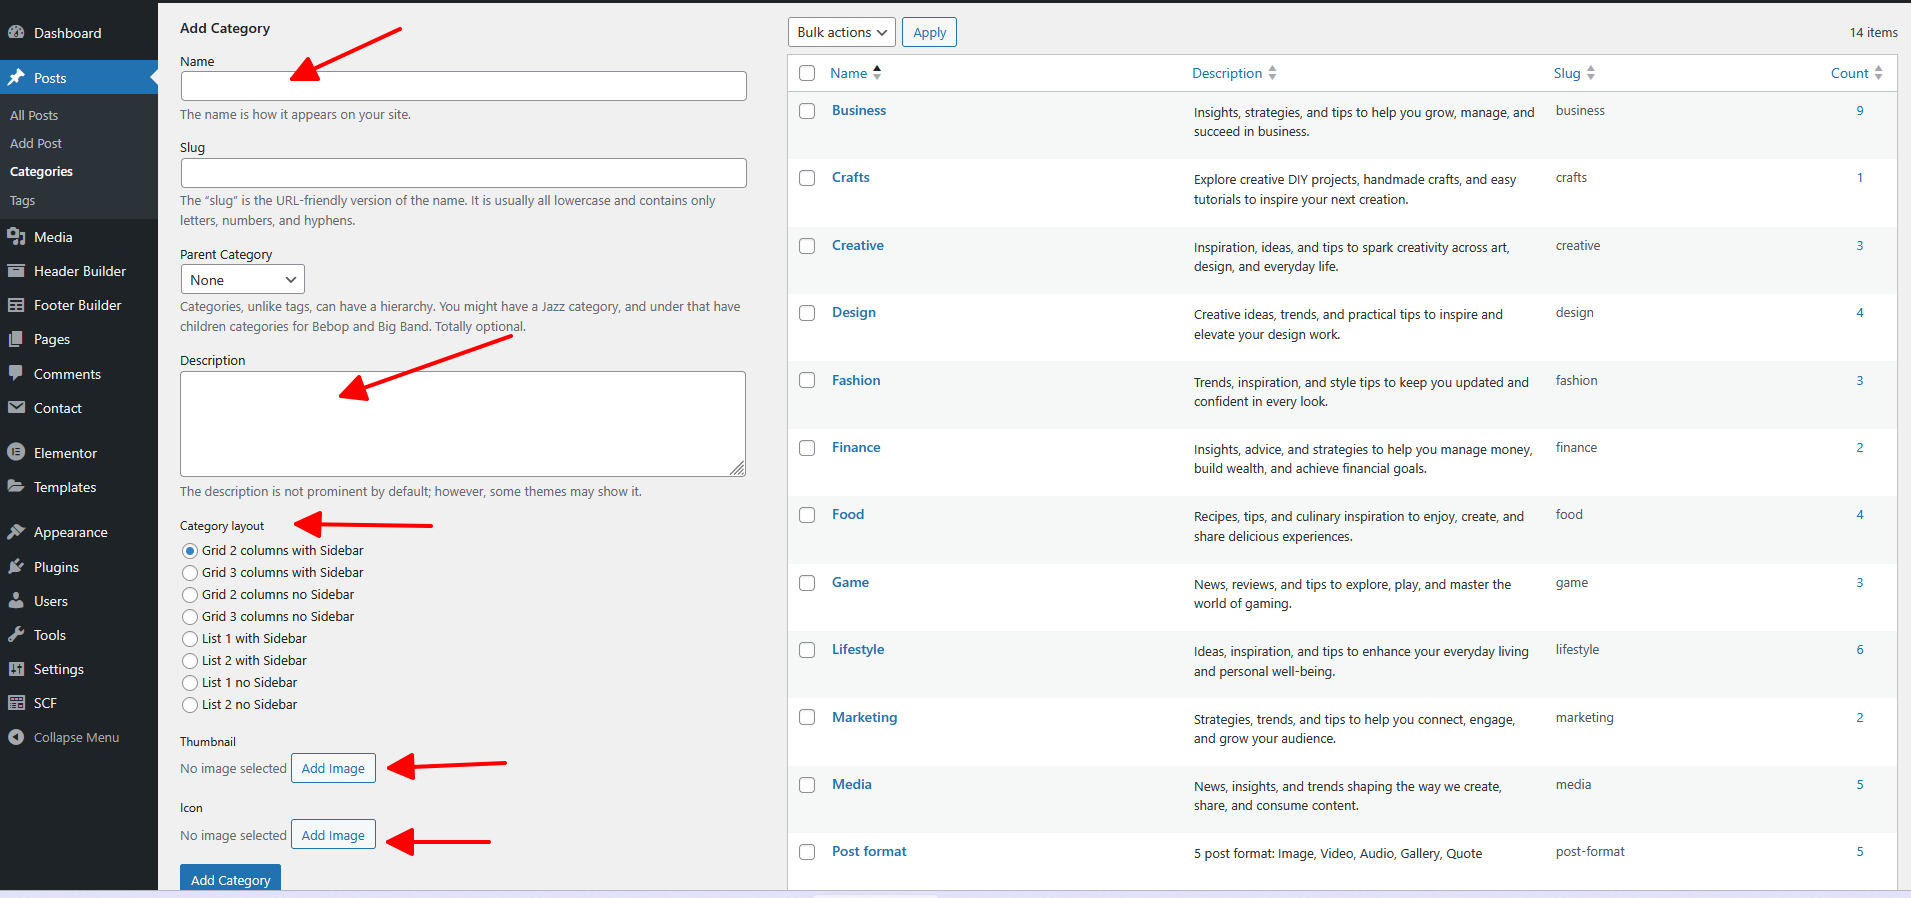
How to Create a Category
Step 1: Post >> Categories
Step 2: Name the category and fill to other section below.
Step 3: Hit Add New Category. Your new Category will aprear in the table of all category immediately.
You can choose different layouts for each Category. You can also select a Thumbnail and an Icon for each category. Very flexible.
Similar to Category, you can create a new Tag in the same way.
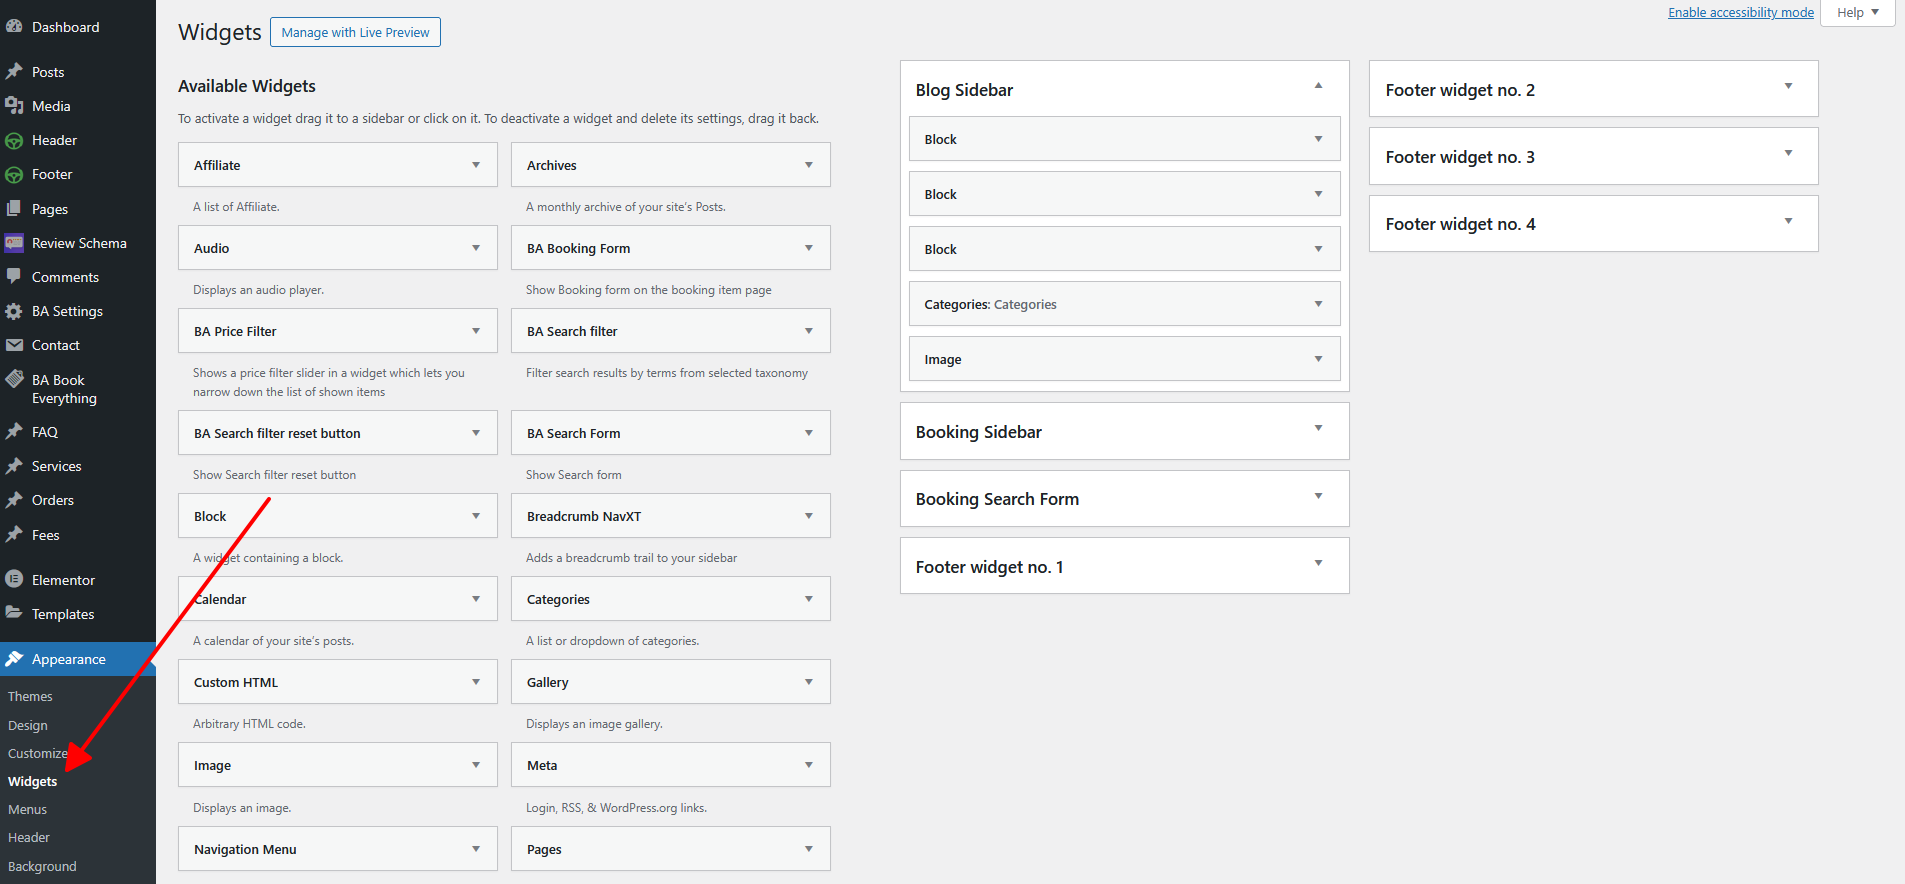
How to Add Widget in Sidebar
Step 1: Appearance >> Widgets. You can see all of the Sidebar here.
Step 2:Choose the Widgets you want and drag it to the Sidebar you want or click on it to choose the Sidebar.
In the case you want to delete its settings, drag it back.
Free Support System
All of alithemes’s items
come with 6 months of included support and free lifetime updates for your Theme.
Once the 6 months of included support is up, you have the opportunity to extend support
coverage up to 6 or 12 months further.
If you choose to not extend your support, you will still be able to submit bug reports via
email or item comments and still have access to our online documentation knowledge base and video tutorials.
We have an advanced, secure ticket system to handle your requests. Support is limited to questions regarding the theme’s features or issues that are related the theme. We are not able to provide support for code customizations or third-party plugins. If you need help with anything other than minor customization of your theme, we suggest enlisting the help of a developer.
Our Support Mail
All of our items come with free support, and we have a dedicated mail: https://alithemes.ticksy.com/ to handle your requests. Support is limited to questions regarding the theme’s features or problems with the theme. We are not able to provide support for code customizations or third-party plugins. If you need help with anything other than minor customizations of your theme then you should enlist the help of a developer.
Item Support Includes
- Answering questions about how to use the item
- Answering technical questions about the item
- Help with defects in the item
- Item updates to ensure ongoing compatibility and to resolve security vulnerabilities
Not Included in Item Support
- Theme customization and requests that require or involve custom coding
- Installation of the item
- Hosting, server environment, or software
- Support for compatibility with 3rd party plug-ins
- Support for out-dated or modified themes
For more information on Item Support Policy please refer to the original document..
Thank you for use this theme.
Once again, thank you so much for purchasing this theme. As we said at the beginning, we'd be glad to help you if you have any questions relating to this theme, We'll do our best to assist.
If you have a more general question relating to the themes on ThemeForest, you might consider visiting the forums and asking your question in the "Item Discussion" section.
If you’re happy with our product and service, we’d truly appreciate it if you could leave us a positive review and rating, we are very grateful to you for that. How to giving a feedback on ThemeForest
https://help.market.envato.com/hc/en-us/articles/203269490-Giving-Feedback-On-Items
Best regards.
AliThemes Team